Facebook Pixel

Tagged with 'Indoor'

Matériaux Pont Masson Blog

Sones and CFM: How to Choose the Right Kitchen Range Hood or Bathroom Fan

When shopping for a kitchen range hood or a bathroom exhaust fan, two technical terms often come up: sones and CFM. While they may sound complex at first, these numbers are essential to choosing an appliance that is efficient, quiet, and well-suited to your space.

At Pont-Masson, we believe that making the right choice starts with understanding the basics. Here’s a simple guide to help you shop with confidence.


What Does CFM Mean?

CFM (Cubic Feet per Minute) measures the amount of air an appliance can move in one minute. The higher the number, the more powerful the unit.

Why CFM Matters

  • It determines how effectively air is exhausted

  • It affects the removal of:

    • moisture

    • odors

    • smoke

    • grease

Recommended CFM by Application

For a Kitchen Range Hood

  • 300 to 400 CFM: light cooking (electric cooktop, occasional use)

  • 450 to 600 CFM: regular cooking, gas cooktops

  • 600 CFM and up: heavy cooking, large kitchens, or island installations

Tip: The more powerful your cooktop, the higher the CFM your range hood should have.
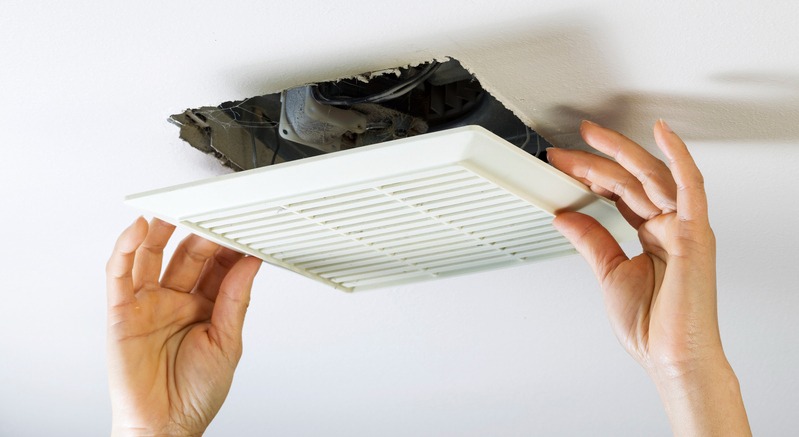
For a Bathroom Fan

  • 50 to 80 CFM: small bathroom or powder room

  • 80 to 110 CFM: standard-sized bathroom

  • 110 CFM and up: large bathrooms or rooms with glass showers or high ceilings

Simple rule: plan for about 1 CFM per square foot of bathroom space.


What Are Sones?

Sones measure the noise level of a fan or hood. The lower the sone rating, the quieter the appliance.

Understanding Sone Levels

  • 0.5 to 1 sone: very quiet (barely noticeable)

  • 1 to 2 sones: quiet and comfortable

  • 3 sones and above: clearly audible


Finding the Right Balance Between Power and Noise

A powerful appliance that is too loud often ends up being underused. The goal is to find the right balance between CFM and sones.

General Recommendations

Kitchen Range Hoods

  • Aim for under 3 sones at normal operating speed

  • Multi-speed models offer greater flexibility

  • A hood that is wider than the cooktop captures smoke more efficiently, reducing the need for excessive power

Bathroom Fans

  • 1.5 sones or less for optimal comfort

  • Ideal for daily or nighttime use

  • Quieter fans are more likely to be left running long enough to properly remove moisture


Other Factors to Consider

  • Proper ducting: poor duct installation reduces performance and increases noise

  • Installation type: wall-mounted, under-cabinet, ceiling-mounted, or island

  • Additional features:

    • timer

    • humidity sensor

    • LED lighting

    • washable filters


In Summary

Feature What to Remember
CFM Measures airflow power
Sones Measures noise level
Kitchen Focus on power with controlled noise
Bathroom Focus on quiet operation with adequate airflow

Need Help Choosing?

The Pont-Masson team is here to help you select the right product based on:

  • room size

  • usage habits

  • budget

  • comfort preferences

Visit us in store or browse www.pontmasson.com to discover a wide selection of kitchen range hoods and bathroom fans for every project.

Make the right choice today for cleaner, healthier air tomorrow.

Matériaux Pont Masson Blog

Manubric: Transform Your Walls with Style

Dreaming of a brick or stone feature wall without the complexity of traditional masonry?
Manubric offers the perfect balance of authenticity, simplicity, and long-lasting design. Made in Quebec, these decorative stones and bricks can elevate any space — indoors or outdoors — with a warm and natural look.


What Is Manubric?

Manubric is a Quebec-based company specializing in lightweight decorative stone and brick.
Each piece is molded from real stones or bricks, then hand-coloured to replicate natural textures and tones.

The result: a beautiful, durable wall covering that installs easily and looks impressively realistic.

Because the products are made from lightweight and resilient materials, they can be applied to drywall, concrete, wood, and more. Their design makes them an accessible decorative solution, even for beginners.


The Advantages of Manubric Products

1. Remarkably realistic

Manubric stones and bricks closely mimic the appearance of natural stone or traditional brick, without the weight, structural requirements, or higher installation costs.

2. Easy to install

Designed with simplicity in mind, these products can be installed using standard mortar and basic tools.
No need to hire a mason — with a few steps, you can achieve a professional-quality finish.

3. Versatile and durable

Whether it’s for a living-room feature wall, a rustic kitchen, or an elegant exterior upgrade, Manubric products resist moisture, frost, and everyday wear.

4. A local and eco-friendly choice

Proudly made in Quebec, Manubric supports local manufacturing and reduces transportation impacts.
Their production process minimizes waste and ensures long-lasting materials.


Where to Use Manubric in Your Home

  • Living room: a brick feature wall for an industrial or loft-style atmosphere.

  • Kitchen: rustic charm behind the counter or around cabinetry.

  • Entryway: a stone accent wall for a warm, inviting look.

  • Exterior: durable cladding for walls, chimneys, or columns.


Conclusion

Choosing Manubric means opting for a decorative solution that is authentic, local, and easy to install.
At Pont Masson, you’ll find the Manubric products along with expert advice to help you complete your project confidently.

Matériaux Pont Masson Blog

The 10 Most Common Interior Renovation Mistakes (and How to Avoid Them)

Introduction

Home renovations are exciting — until one small oversight or bad decision throws the whole project off track. Whether you’re a weekend DIYer or a seasoned handyman, certain mistakes come up again and again.

At Pont-Masson, we’ve helped thousands of homeowners turn their renovation ideas into success stories. Here are the 10 most common interior renovation mistakes — and how to avoid them so your next project goes smoothly, on time, and within budget.


Not Planning Enough

Before picking up your tools, take the time to define your needs, set your budget, and outline your priorities. Proper planning helps you stay organized and avoid costly surprises.

Pont-Masson Tip: Our in-store advisors can help you plan your renovation, choose the right materials, and calculate quantities so you start your project on solid ground.


Underestimating the Budget

Renovations almost always cost more than expected. From small adjustments to unforeseen issues, it’s smart to plan an extra 10–15% in your budget for contingencies.

Pont-Masson experts can help you make an accurate estimate based on your chosen materials, ensuring you know the real cost before starting.


Choosing the Wrong Materials

Each room has its own specific needs — humidity, temperature, traffic level, and exposure. Using the wrong type of wood, paint, or flooring can lead to premature wear or costly rework.

Pont-Masson offers a wide range of high-quality, durable materials adapted to every space. Our experts can guide you toward the best choices for each application.


Skipping Surface Preparation

A professional finish starts with proper prep work. Before painting, laying flooring, or installing wall coverings, make sure to clean, sand, and repair your surfaces.

At Pont-Masson, you’ll find all the tools and products you need for the perfect prep — sandpaper, primers, sealants, cleaners, and more.


Poor Measuring

“Measure twice, cut once.” This classic rule still applies. Even a small measurement error can waste time, money, and materials.

Pont-Masson carries precise measuring tools — tapes, lasers, and levels — and our staff can show you how to use them properly.


6️⃣ Ignoring the Work Sequence

Doing things out of order can lead to frustration and extra work. For example:

  • Installing flooring before painting,

  • Setting fixtures before tiling,

  • Or doing moldings before ceiling finishes.

If you’re unsure of the proper order, Pont-Masson experts can help you plan your renovation step by step.


Forgetting Ventilation

Poor ventilation in a bathroom or kitchen leads to condensation, mold, and odors. Installing the right exhaust fan or air exchanger is essential for a healthy home.

Pont-Masson offers a wide selection of fans, hoods, and ventilation systems that combine performance and energy efficiency.


Neglecting Safety

Never underestimate safety. Protective gear like gloves, goggles, and masks can prevent injuries and keep your project on track.

Pont-Masson provides a full range of safety equipment to help you work confidently and comfortably.


Using the Wrong Tools

Even the best intentions won’t make up for poor tools. The right equipment makes all the difference between frustration and satisfaction.

Pont-Masson carries professional-grade tools — drills, saws, pliers, compressors, and more — and our team will help you choose exactly what you need for your project.


Trying to Do Everything Yourself

Some jobs, like plumbing and electrical work, require professional expertise and certification. Knowing when to call in the pros is a sign of wisdom, not weakness.

Pont-Masson partners with trusted local contractors and can recommend qualified professionals for your specialized renovation needs.

Matériaux Pont Masson Blog

How to Install Shelves on a Drywall Wall — Practical Guide

Want to add a bit of storage or style to your space without too much effort? Installing wall shelves is a simple, effective, and aesthetic solution. However, when working with drywall (gypsum board), it’s best to proceed carefully to avoid unpleasant surprises.

Here’s a step-by-step practical guide to help you achieve a clean, level, and secure installation.


Required Materials

Tools:

  • Measuring tape

  • Level (bubble or laser)

  • Pencil

  • Drill-driver

  • Drywall drill bits

  • Screwdriver

  • Masking tape

  • Stud finder (recommended)

Materials:

  • Shelf (or shelves)

  • Brackets or invisible mounts

  • Alligator anchors (recommended)

  • Plastic wall plugs (optional)

  • Screws


Step 1 – Planning

Before drilling, take a moment to plan:

  • Where exactly do you want to place the shelf?

  • Will it hold decorative items or heavier loads?

  • Can you screw into a wall stud? (This increases strength.)

Tip: Use a stud finder to locate solid points behind the wall. If you don’t have one, gently tap on the wall — a duller sound indicates a stud.


Step 2 – Draw Straight Reference Lines

  • Apply masking tape to the wall at the approximate shelf height.

  • Use your level to draw a perfectly straight line along the tape.

  • Mark where each bracket will go, ensuring they’re at the same height.

Tips for perfect alignment:

  • A laser level gives precise horizontal lines.

  • Fix one bracket first, place the shelf on it, and adjust the second bracket before drilling.

  • If installing multiple shelves, use a small cardboard or wood template to mark consistent heights.


Step 3 – Drill and Insert Anchors

If you can’t screw directly into a stud, use alligator anchors—they provide strong support in drywall.
Plastic anchors can work for lighter loads but are less durable.

  • Drill holes at your marked spots.

  • Insert the alligator anchors.

  • Screw gently so the anchor expands and locks securely into the wall.


Step 4 – Attach the Brackets

  • Screw the brackets into the anchors (or directly into a stud, if available).

  • Use your level to confirm they’re straight before tightening the screws fully.


Step 5 – Install the Shelf

  • Place the shelf on the brackets.

  • If there are pre-drilled holes, secure the shelf from underneath using short screws.

  • Do one final level check — and you’re done!


Extra Tips

  • Space multiple shelves evenly (12–16 inches apart, depending on use).

  • For heavy loads (books, dishes), use alligator anchors and try to secure at least one screw into a stud.

  • For a minimalist look, choose invisible mounts, though they require more precise installation.


In Summary

Installing shelves on drywall is perfectly doable with the right anchors and careful preparation.
With alligator anchors and accurate markings, your shelves will be straight, sturdy, and ready to showcase your favorite décor.

Matériaux Pont Masson Blog

8 Common Painting Mistakes to Avoid When Decorating a Room

When painting a room, certain mistakes can compromise the final look and durability of the job. Here are the main errors to avoid and how to fix them:

  1. Not properly preparing the walls
    ❌ Mistake: Painting over dirty, damp, or uneven surfaces.
    ✅ Solution: Clean the walls (dust, grease), fill holes and cracks with filler, then sand for a smooth surface.

  2. Skipping the primer
    ❌ Mistake: Applying paint directly on raw walls or over dark colors.
    ✅ Solution: Use a suitable primer (plaster, wood, metal...) to improve adhesion and reduce the number of coats needed.

  3. Choosing low-quality paint
    ❌ Mistake: Using cheap paint that doesn’t cover well and deteriorates quickly.
    ✅ Solution: Invest in high-quality paint with good coverage and durability (especially for kitchens, bathrooms, washable surfaces...).

  4. Painting without protecting the room
    ❌ Mistake: Not covering floors, furniture, and baseboards, leading to hard-to-remove stains.
    ✅ Solution: Lay down a tarp, use masking tape for edges, and cover furniture with plastic sheeting.

  5. Applying too much paint at once
    ❌ Mistake: Overloading the roller or brush, causing drips and visible streaks.
    ✅ Solution: Apply several thin coats, cross strokes (horizontal then vertical), and let each layer dry properly.

  6. Painting in poor conditions
    ❌ Mistake: Painting in a room that’s too humid or too hot.
    ✅ Solution: Work in a well-ventilated room at a temperature between 15–25°C, and avoid days with high humidity.

  7. Ignoring drying times
    ❌ Mistake: Moving furniture back too soon or applying another coat before the previous one is dry.
    ✅ Solution: Follow the drying time indicated on the paint can (usually 6 to 24 hours between coats) to avoid marks and imperfections.

  8. Neglecting the finishing touches
    ❌ Mistake: Leaving visible lines or removing masking tape too late.
    ✅ Solution: Smooth edges with a light roller pass and remove masking tape before the paint fully dries to prevent peeling.

By avoiding these mistakes, you'll achieve a clean, even, and long-lasting result for your interior painting!

Matériaux Pont Masson Blog

How to Install a Baseboard Heater for Efficient Heating

Installing a baseboard heater is an effective way to heat your home, especially in regions with harsh winters like Québec. These units provide even heat and are relatively easy to install. Here’s a step-by-step guide to help you install a baseboard heater in your home.


Why Choose a Baseboard Heater?

Baseboard heaters offer several advantages:

  • Energy Efficiency: They convert nearly all consumed energy into heat.
  • Simple Installation: With basic tools, you can install them yourself.
  • Even Heating: They distribute heat evenly throughout the room.

Steps to Install a Baseboard Heater

1. Choose the Location

Install the heater along an exterior wall—often called a “cold wall”—to counter heat loss. Make sure to leave at least 6 inches of space above the unit for proper air circulation.

2. Turn Off the Power

Before starting, turn off the power at the main panel to avoid any risk of electric shock.

3. Mount the Heater to the Wall

Use the pre-drilled holes on the unit to securely attach it to the wall. Ensure the heater is level for optimal performance.

4. Connect the Electrical Wires

Connect the heater wires to the power supply wires, following local electrical codes. If you’re not comfortable with electrical work, it’s best to hire a professional.

5. Install the Thermostat

Some heaters come with a built-in thermostat, while others require a separate installation. Follow the manufacturer’s instructions for proper setup.

6. Restore Power and Test the Unit

Once installation is complete, turn the power back on and test the heater to ensure it’s working properly.


How to Determine the Right Power Rating for Your Heater

Use the following formula to calculate the required wattage:

Power (W) = Room Area (m²) × Heating Requirement (W/m²)

Heating Requirement varies based on insulation:

  • Well-insulated home: 80–100 W/m²
  • Average insulation: 100–120 W/m²
  • Poor insulation: 120–150 W/m²

Example:
For a 15 m² room with average insulation:
15 m² × 100 W/m² = 1500 W

You would need a baseboard heater of approximately 1500 W to heat this room efficiently.


Additional Tips

  • Install on an Exterior Wall: Placing the heater under a window helps counter cold drafts.
  • Regular Maintenance: Clean the heater to prevent dust buildup and maintain performance.

By following these steps and using the right formula to determine the required power, you’ll enjoy efficient and comfortable heating all winter long.

Matériaux Pont Masson Blog

5 Good Reasons to Install SPC Vinyl Flooring

SPC vinyl flooring (Stone Plastic Composite) is an increasingly popular floor covering thanks to its strength and many qualities. Here are five major advantages of this type of flooring:


1. High Resistance and Durability

SPC is made from a blend of limestone and plastic, making it extremely resistant to impacts, scratches, and wear. It’s ideal for high-traffic areas such as kitchens, hallways, and commercial spaces.


2. 100% Waterproof

Unlike wood or laminate flooring, SPC vinyl is completely water-resistant. It can be installed in damp areas like bathrooms, basements, and kitchens without the risk of swelling or warping.


3. Easy Installation

Thanks to its click-lock system, SPC is easy to install—even for amateur DIYers. No glue or nails are needed, which reduces both installation time and cost.


4. Comfort and Acoustic Insulation

Some models include an underlayer made of foam or cork, offering good sound insulation and a pleasant walking surface. Unlike tile, it also feels warmer underfoot.


5. Easy Maintenance and Hygiene

This type of flooring requires no special treatment. A simple cleaning with a damp mop and mild detergent is enough to maintain its appearance. It’s also stain- and bacteria-resistant, making it perfect for families with children or pets.


In Summary

SPC vinyl flooring is durable, waterproof, easy to install, comfortable, and low-maintenance—making it an excellent choice for many spaces.


Tips from the “Team to Beat”

1. Vary Patterns for a Natural Look

Vinyl flooring typically comes with 5 to 10 different patterns, each representing a unique visual. For a more harmonious and realistic result, avoid placing two identical prints side by side.

Tip: Open 2 to 3 boxes in advance to mix the planks and achieve a more balanced distribution of patterns.


2. Avoid Brick or Stair-Step Layouts

To ensure the floor’s strength, opt for a random arrangement of vinyl planks or tiles. A layout that’s too regular—like brick or stair-step—can weaken the joints and increase the risk of cracks under pressure.

✅ Choose an irregular layout to ensure better load distribution and optimal durability of the flooring.