Facebook Pixel

Tagged with 'Guides'

Matériaux Pont Masson Blog

How to Identify Electrical Wire Types in Canada

Warning – Electrical Safety
The information provided in this article is for general informational purposes only. Electrical work must comply with the Québec Construction Code and, in some cases, be performed by a certified master electrician. When in doubt, consult a qualified professional.


Choosing the right electrical wire is essential for safety, code compliance, and performance. In Canada, electrical wires are identified by their color, gauge, and designation (e.g. 14/2, 12/3), which can be confusing if you’re not familiar with these standards.

This guide will help you understand and identify the most common electrical wire types used in Canadian homes.


Understanding Wire Designations: 14/2, 12/3, etc.

Designations such as 14/2 or 12/3 provide two key pieces of information:

1. Wire Gauge (First Number)

The gauge refers to the thickness of the conductor, measured using the AWG (American Wire Gauge) system.

The smaller the number, the thicker the wire and the higher the amperage it can carry.

Gauge Max Amperage Common Uses
14 AWG 15 A Lighting, standard outlets
12 AWG 20 A Kitchen, bathroom
10 AWG 30 A Dryer, water heater
8 AWG 40 A Range
6 AWG 55 A Oven, subpanel

2. Number of Conductors (Second Number)

The second number indicates the number of insulated conductors, not including the ground wire.

  • 14/2 = 2 insulated conductors + 1 ground wire

  • 12/3 = 3 insulated conductors + 1 ground wire

“/3” cables are commonly used for:

  • three-way switches

  • appliances requiring two hot wires

  • shared circuits


Electrical Wire Colors (Canadian Standards)

Wire color indicates the function of each conductor in a circuit.

Color Function
Black Hot (live)
Red Secondary hot
White Neutral
Green or bare copper Ground

Important: A white wire may sometimes be used as a hot wire if it has been re-identified with black or red tape.


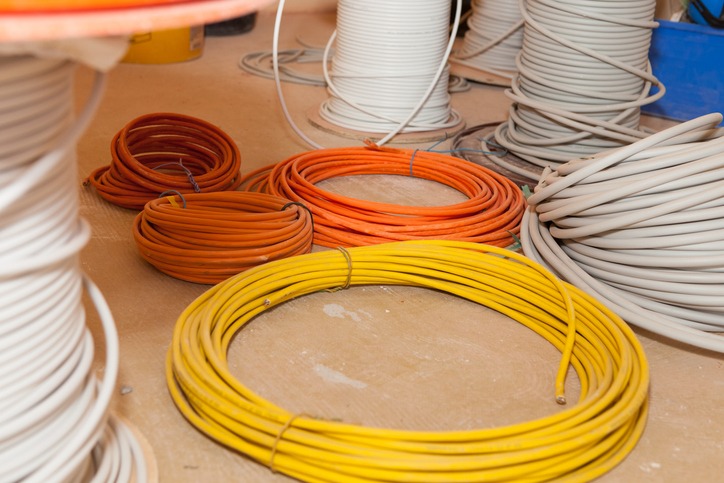
Outer Sheath Color (NMD90 Cable)

In Canada, residential NMD90 cables are often identified by the color of the outer sheath.

Sheath Color Gauge
White 14 AWG
Yellow 12 AWG
Orange 10 AWG

This color coding helps with quick identification on job sites, but always verify the printed markings on the cable.


Common Types of Electrical Wire

NMD90

  • Indoor residential use

  • Dry walls and ceilings

  • Most common household wiring

BX / AC

  • Metal-clad cable

  • Impact-resistant

  • Often used in basements

TECK / RW90 Wire

  • Outdoor or industrial use

  • Moisture-resistant

  • Surface-mounted or installed in conduit


Choosing the Right Wire: Common Mistakes to Avoid

❌ Using 14 AWG wire on a 20 A breaker
❌ Relying only on color without checking the designation
❌ Mixing wire gauges on the same circuit

✔️ Always match wire gauge to breaker amperage
✔️ Read cable markings carefully
✔️ When in doubt, ask for expert advice


Summary

  • Wire gauge determines current capacity

  • Number of conductors depends on application

  • Colors indicate wire function

  • Sheath colors aid quick identification

  • Code compliance is essential for safety


Need Help With Your Electrical Project?

The Pont-Masson team can help you choose the right electrical wire based on:

  • your project needs

  • current electrical codes

  • your experience level

Visit us in store or browse www.pontmasson.com to find a wide selection of electrical wire, boxes, breakers, and accessories.

The right wire means a safer, longer-lasting installation.

Matériaux Pont Masson Blog

How to Know When to Replace Your Roof Shingles

Your roof is one of the most important components of your home. It protects you from harsh weather, cold, heat, and moisture. However, many homeowners wait too long before replacing their shingles, which can lead to costly damage. So, how do you know when it’s time to replace your roof shingles? Here are the key signs to watch for.


1. The Age of Your Shingles

Asphalt shingles typically last between 15 and 25 years, depending on their quality, installation, and weather conditions. In Québec and Ontario, harsh winters, freeze-thaw cycles, and strong winds can shorten their lifespan.

Good to know:
If your roof is approaching or has exceeded 15–20 years, even if it still looks fine, a professional inspection is strongly recommended.


2. Shingles That Are Curling, Cracked, or Lifting

One of the most obvious signs of an aging roof is shingles that are:

  • curling or buckling;

  • cracked;

  • lifting due to wind exposure.

These issues indicate that the shingles have lost their flexibility and sealing ability.


3. Granules in the Gutters or on the Ground

Asphalt shingles are coated with granules that protect them from UV rays and wear. Over time, these granules begin to loosen and fall off.

Warning sign:
If you notice a significant amount of granules in your gutters or around your home’s foundation, it’s a clear sign your shingles are deteriorating.


4. Water Leaks or Stains on Ceilings

Water infiltration should never be ignored. Even small brown stains on ceilings or walls can indicate:

  • damaged shingles;

  • worn underlayment;

  • ventilation or flashing issues.

The longer you wait, the more expensive repairs can become, as water can damage insulation, roof structure, and even cause mold.


5. Missing Shingles After a Storm

After strong winds or storms, it’s always a good idea to visually inspect your roof. Missing or displaced shingles expose your home directly to the elements.

A single missing shingle can sometimes be repaired, but if this happens repeatedly, a full roof replacement may be the best solution.


6. A Sagging Roof

A visibly sagging roof is a serious warning sign. It may indicate structural problems caused by:

  • prolonged water infiltration;

  • excess weight from snow or ice;

  • deterioration of the roof decking.

In this situation, it’s essential to consult a professional as soon as possible.


7. Rising Heating or Cooling Costs

An aging roof can lose its energy efficiency. If your home becomes harder to heat in winter or keep cool in summer, your roof could be part of the problem.

Replacing shingles and improving roof ventilation can increase comfort and reduce energy costs.


Repair or Replace?

A simple repair may be enough if:

  • the roof is relatively new;

  • the damage is localized;

  • the roof structure is in good condition.

However, if problems are frequent or widespread, replacing the shingles is often more cost-effective in the long run.


Trust the Experts at Pont-Masson

At Pont-Masson, we understand that your roof is a major investment. Our experts can help you:

  • assess the condition of your shingles;

  • choose the right materials for your home and Canada's climate;

  • determine the right time to replace your roof.

Not sure about your roof’s condition?
It’s always better to inspect it early before a small issue becomes a major repair.


Need Roofing Advice or Materials?

Visit us in-store or explore www.pontmasson.com to discover our selection of shingles, roofing accessories, and expert advice.

Matériaux Pont Masson Blog

How to Replace a Toilet: Step-by-Step Guide

Replacing a toilet is a simple home project that many homeowners can do themselves with the right tools and preparation. Whether you’re upgrading your bathroom or replacing an old model, here’s how to do it efficiently.

1. Gather your tools and materials

Before you begin, make sure you have:

  • A new toilet (tank and bowl)

  • A new wax or rubber seal

  • An adjustable wrench

  • A putty knife

  • A level

  • Gloves and rags

Pont Masson Tip: You’ll find all the tools and supplies you need in store, including experts to answer your questions!

2. Remove the old toilet

  1. Shut off the water supply and flush to empty the tank.

  2. Disconnect the water line.

  3. Unscrew the bolts at the base.

  4. Gently lift the toilet (two people makes it easier).

  5. Remove the old wax ring and clean the floor flange.

3. Install the new seal

Place the new wax or rubber seal on the flange, making sure it’s centered.

4. Position the new toilet

  • Align the holes with the bolts.

  • Press down firmly to seat the seal.

  • Tighten the bolts evenly (don’t overtighten).

  • Check that the toilet is level.

5. Reconnect the water and test

  • Reattach the water supply line.

  • Turn the water back on.

  • Let the tank fill and check for leaks.

6. Final touches

  • Trim any excess bolts.

  • Replace the bolt caps.

  • Seal around the base with silicone if desired.

Conclusion

Replacing a toilet yourself is an easy and affordable way to update your bathroom. Follow these simple steps for a clean, durable result — and visit Pont Masson for all your plumbing essentials.

Matériaux Pont Masson Blog

Get Your Home Winter-Ready: 7 Simple Ways to Save Energy and Money

As the cold weather sets in, our homes become cozy refuges — but winter in Québec can also mean high heating bills!
The good news? You can make your home more energy-efficient without major renovations or big expenses.
Here are 7 easy tips to stay warm this winter while saving energy (and money).


Seal Air Leaks

Small air leaks around doors and windows can account for up to 25% of heat loss.
Use caulking or weatherstripping to block drafts.
Pont Masson offers a variety of easy-to-install products to help you get started.


Switch to LED Lighting

LED bulbs use up to 80% less energy and last much longer than traditional ones.
A small change with a big impact throughout your home.


Insulate Your Attic and Basement

Heat rises — and often escapes through the roof.
Check the insulation in your attic and basement floor.
Adding insulation can quickly improve comfort and efficiency.


Maintain Your Heating System

Clean or replace filters and make sure vents aren’t blocked.
A well-maintained heating system uses less energy and keeps your home evenly warm.


Install Programmable Thermostats

Smart thermostats adjust the temperature automatically based on your schedule.
Lower the heat at night or when you’re away — and save up to 10% annually on energy bills.


Dress Your Windows

Heavy curtains or insulating window film can reduce heat loss by up to 15%.
Close them at night to keep the warmth in and open them during the day to let in sunlight.


Do a Quick Outdoor Check-Up

Before freezing temperatures arrive, inspect window seals, clean gutters, and protect outdoor faucets.
Small maintenance steps can prevent big problems later.


Conclusion

Winterizing your home doesn’t have to be complicated.
With a few smart upgrades and quality materials from Pont Masson, you can enjoy a warmer, greener, and more efficient home all season long.

Matériaux Pont Masson Blog

The 10 Most Common Interior Renovation Mistakes (and How to Avoid Them)

Introduction

Home renovations are exciting — until one small oversight or bad decision throws the whole project off track. Whether you’re a weekend DIYer or a seasoned handyman, certain mistakes come up again and again.

At Pont-Masson, we’ve helped thousands of homeowners turn their renovation ideas into success stories. Here are the 10 most common interior renovation mistakes — and how to avoid them so your next project goes smoothly, on time, and within budget.


Not Planning Enough

Before picking up your tools, take the time to define your needs, set your budget, and outline your priorities. Proper planning helps you stay organized and avoid costly surprises.

Pont-Masson Tip: Our in-store advisors can help you plan your renovation, choose the right materials, and calculate quantities so you start your project on solid ground.


Underestimating the Budget

Renovations almost always cost more than expected. From small adjustments to unforeseen issues, it’s smart to plan an extra 10–15% in your budget for contingencies.

Pont-Masson experts can help you make an accurate estimate based on your chosen materials, ensuring you know the real cost before starting.


Choosing the Wrong Materials

Each room has its own specific needs — humidity, temperature, traffic level, and exposure. Using the wrong type of wood, paint, or flooring can lead to premature wear or costly rework.

Pont-Masson offers a wide range of high-quality, durable materials adapted to every space. Our experts can guide you toward the best choices for each application.


Skipping Surface Preparation

A professional finish starts with proper prep work. Before painting, laying flooring, or installing wall coverings, make sure to clean, sand, and repair your surfaces.

At Pont-Masson, you’ll find all the tools and products you need for the perfect prep — sandpaper, primers, sealants, cleaners, and more.


Poor Measuring

“Measure twice, cut once.” This classic rule still applies. Even a small measurement error can waste time, money, and materials.

Pont-Masson carries precise measuring tools — tapes, lasers, and levels — and our staff can show you how to use them properly.


6️⃣ Ignoring the Work Sequence

Doing things out of order can lead to frustration and extra work. For example:

  • Installing flooring before painting,

  • Setting fixtures before tiling,

  • Or doing moldings before ceiling finishes.

If you’re unsure of the proper order, Pont-Masson experts can help you plan your renovation step by step.


Forgetting Ventilation

Poor ventilation in a bathroom or kitchen leads to condensation, mold, and odors. Installing the right exhaust fan or air exchanger is essential for a healthy home.

Pont-Masson offers a wide selection of fans, hoods, and ventilation systems that combine performance and energy efficiency.


Neglecting Safety

Never underestimate safety. Protective gear like gloves, goggles, and masks can prevent injuries and keep your project on track.

Pont-Masson provides a full range of safety equipment to help you work confidently and comfortably.


Using the Wrong Tools

Even the best intentions won’t make up for poor tools. The right equipment makes all the difference between frustration and satisfaction.

Pont-Masson carries professional-grade tools — drills, saws, pliers, compressors, and more — and our team will help you choose exactly what you need for your project.


Trying to Do Everything Yourself

Some jobs, like plumbing and electrical work, require professional expertise and certification. Knowing when to call in the pros is a sign of wisdom, not weakness.

Pont-Masson partners with trusted local contractors and can recommend qualified professionals for your specialized renovation needs.

Matériaux Pont Masson Blog

Home Toolbox Essentials

Introduction

Having a well-stocked toolbox at home is the key to being prepared for small repairs, DIY projects, or household emergencies.
Whether you’re just starting out or you’ve been handy for years, some tools are simply essential. Here’s a list of must-haves every home should have.


1. Basic Tools

  • Hammer – for hanging frames, driving nails, or adjusting parts.

  • Screwdrivers (flat and Phillips head) – essential for assembling or taking things apart.

  • Pliers (adjustable and cutting) – perfect for gripping, cutting, or bending materials.

  • Adjustable wrench – useful for tightening or loosening nuts and bolts of different sizes.


2. Measuring and Marking Tools

  • Measuring tape – for accurate measurements before cutting or drilling.

  • Level – ensures your shelves, frames, and furniture are perfectly straight.

  • Carpenter’s square – to check right angles and make precise markings.

  • Carpenter’s pencil – for marking points and cutting lines.


3. Power Tools

  • Drill-driver – a must-have for assembling furniture or drilling into walls.

  • Jigsaw – great for cutting wood, plastic, or plywood.

Tip: Invest in rechargeable batteries and keep a set of drill bits for different materials.


4. Accessories and Supplies

  • Screws, nails, and wall plugs – keep an assortment of sizes on hand.

  • Duct tape, strong glue, and lubricant (like WD-40) – ideal for quick fixes.

  • Flashlight – essential for dark corners or power outages.


5. Safety First

Never skip safety gear:

  • Work gloves to protect your hands.

  • Safety goggles to guard against dust and debris.

  • Dust mask for cutting or sanding projects.


Conclusion

A good toolbox is an investment in peace of mind.
With these essentials on hand, you’ll be ready to tackle most home repairs and small projects with confidence and ease.

Matériaux Pont Masson Blog

How to Install Shelves on a Drywall Wall — Practical Guide

Want to add a bit of storage or style to your space without too much effort? Installing wall shelves is a simple, effective, and aesthetic solution. However, when working with drywall (gypsum board), it’s best to proceed carefully to avoid unpleasant surprises.

Here’s a step-by-step practical guide to help you achieve a clean, level, and secure installation.


Required Materials

Tools:

  • Measuring tape

  • Level (bubble or laser)

  • Pencil

  • Drill-driver

  • Drywall drill bits

  • Screwdriver

  • Masking tape

  • Stud finder (recommended)

Materials:

  • Shelf (or shelves)

  • Brackets or invisible mounts

  • Alligator anchors (recommended)

  • Plastic wall plugs (optional)

  • Screws


Step 1 – Planning

Before drilling, take a moment to plan:

  • Where exactly do you want to place the shelf?

  • Will it hold decorative items or heavier loads?

  • Can you screw into a wall stud? (This increases strength.)

Tip: Use a stud finder to locate solid points behind the wall. If you don’t have one, gently tap on the wall — a duller sound indicates a stud.


Step 2 – Draw Straight Reference Lines

  • Apply masking tape to the wall at the approximate shelf height.

  • Use your level to draw a perfectly straight line along the tape.

  • Mark where each bracket will go, ensuring they’re at the same height.

Tips for perfect alignment:

  • A laser level gives precise horizontal lines.

  • Fix one bracket first, place the shelf on it, and adjust the second bracket before drilling.

  • If installing multiple shelves, use a small cardboard or wood template to mark consistent heights.


Step 3 – Drill and Insert Anchors

If you can’t screw directly into a stud, use alligator anchors—they provide strong support in drywall.
Plastic anchors can work for lighter loads but are less durable.

  • Drill holes at your marked spots.

  • Insert the alligator anchors.

  • Screw gently so the anchor expands and locks securely into the wall.


Step 4 – Attach the Brackets

  • Screw the brackets into the anchors (or directly into a stud, if available).

  • Use your level to confirm they’re straight before tightening the screws fully.


Step 5 – Install the Shelf

  • Place the shelf on the brackets.

  • If there are pre-drilled holes, secure the shelf from underneath using short screws.

  • Do one final level check — and you’re done!


Extra Tips

  • Space multiple shelves evenly (12–16 inches apart, depending on use).

  • For heavy loads (books, dishes), use alligator anchors and try to secure at least one screw into a stud.

  • For a minimalist look, choose invisible mounts, though they require more precise installation.


In Summary

Installing shelves on drywall is perfectly doable with the right anchors and careful preparation.
With alligator anchors and accurate markings, your shelves will be straight, sturdy, and ready to showcase your favorite décor.

Matériaux Pont Masson Blog

Practical Guide: Low-Expansion Foam

Low-expansion foam is a valuable ally in construction, renovation, and insulation work. Easy to use and extremely effective when properly applied, it improves thermal and sound insulation, fills narrow gaps, and seals openings without causing damage. But when exactly should you use it—and how can you ensure proper application? Here’s a practical guide.


What Is Low-Expansion Foam?

Unlike high-expansion foam, which can expand up to three times its initial volume, low-expansion foam remains more contained (typically 10–30% expansion). This makes it ideal for precision work or in areas where excessive expansion could warp materials or block mechanisms.


When to Use It

Here are some situations where low-expansion foam is particularly suitable:

  1. Around Doors and Windows
    It seals gaps between the frame and wall without exerting too much pressure, preventing warping that could hinder proper opening or closing.

  2. Filling Small Cavities
    In walls, floors, or ceilings—perfect for filling small holes without overflow or excessive swelling.

  3. For Precise Insulation Projects
    It’s great around electrical boxes, pipes, or wooden structures where uncontrolled expansion could crack or damage components.

  4. When Maximum Control Is Needed
    In finished areas (like painted walls or drywall), low-expansion foam minimizes potential damage.


How to Use It Properly

  1. Prepare the Surface
    Ensure the surface is clean, dry, and dust-free. A slight misting of water can help the foam cure faster.

  2. Shake the Can Thoroughly
    Shake the cartridge vigorously for about 30 seconds before use to mix the components properly.

  3. Apply with Precision
    Insert the nozzle into the gap and apply slowly from the back outward. Fill only 50–70% of the space—the foam will expand slightly.

  4. Let It Cure Completely
    Depending on the product, curing takes between 1 and 8 hours. Avoid touching it during this time.

  5. Trim the Excess and Finish
    Once cured, cut off any surplus with a knife and cover with plaster, paint, or another finish.


Additional Tips

  • Always wear gloves and safety goggles.

  • Keep foam cleaner handy for fresh spills.

  • Don’t shake the can while applying.

  • Store upright at room temperature to prevent clogging.


In Summary

Low-expansion foam is perfect for precise applications. When used correctly, it provides long-lasting, damage-free insulation. Whether you’re a weekend DIYer or a professional, knowing when and how to use it will help you achieve better results and avoid costly mistakes.

Matériaux Pont Masson Blog

How to Calculate the Number of Siding Packs Needed to Redo a House Exterior

Redoing your home’s exterior siding is a major project that enhances the appearance, protects the structure, and improves energy efficiency. To plan properly, you need to know how many packs of siding will be required. Here’s a clear guide to help you calculate it yourself.


1. Measure the Wall Surface Area

Start by measuring each wall of the house: the width and height, in feet (ft). Multiply these two values to get the wall area in square feet (sq. ft).

For example, a wall that’s 30 ft wide and 10 ft high gives you 300 sq. ft.

Do this calculation for each wall:

  • Front wall: 30 ft × 10 ft = 300 sq. ft

  • Back wall: 30 ft × 10 ft = 300 sq. ft

  • Left wall: 24 ft × 10 ft = 240 sq. ft

  • Right wall: 24 ft × 10 ft = 240 sq. ft
    Total gross area: 1,080 sq. ft


2. Subtract Openings

Next, calculate the surface area of windows and doors to subtract from the total area.

For example:

  • 1 door, 3 ft × 7 ft = 21 sq. ft

  • 5 windows, 3 ft × 4 ft = 12 sq. ft each → 60 sq. ft total
    Total openings: 81 sq. ft
    Net surface area to cover: 1,080 sq. ft – 81 sq. ft = 999 sq. ft


3. Add a Waste Margin

Add about 10% to 15% to compensate for cuts and fitting adjustments.

If you apply a 10% margin:
999 sq. ft × 1.10 = 1,098.9 sq. ft, which you can round up to 1,100 sq. ft


4. Calculate the Number of Packs Needed

Check how many square feet are covered by one pack of your chosen siding.
For example, one pack of CanExel Ridgewood D5 covers 44 sq. ft.
Divide the total surface area by the coverage per pack:

1,100 sq. ft ÷ 44 sq. ft = 25 packs

Always round up to the next whole number.
You’ll therefore need 25 packs.


Summary

Step Result
Wall area 1,080 sq. ft
Minus openings 81 sq. ft
Net surface area 999 sq. ft
+10% waste margin ≈ 1,100 sq. ft
Coverage per pack 44 sq. ft
Required packs 25 packs

Conclusion

By taking the time to measure accurately and account for waste, you can avoid surprises and ensure a well-planned siding project. It’s also wise to buy one or two extra packs to cover potential repairs or installation errors.

Matériaux Pont Masson Blog

Prep and Stain Your Wooden Deck the Right Way

How to Properly Prepare and Stain Your Wooden Deck

With the return of warm weather, your wooden deck becomes a central spot for meals, relaxation, and outdoor living. To keep it welcoming and in good condition, regular maintenance is essential. It starts with proper preparation followed by the application of a suitable exterior stain.

In this article, you’ll discover the key steps to effectively maintain your deck, along with product suggestions available at PontMasson.


1. Inspect and Clean the Deck
Before starting, inspect the entire deck. Look for cracked boards, protruding nails, or signs of rot. Replace damaged parts and reinforce loose fasteners.

Cleaning is essential to remove dirt, mold, old stain residue, or pollution. Use a specialized wood cleaner like SICO’s deep-acting formula that won’t damage the wood.

Apply the product as directed, let it sit, then rinse thoroughly with a garden hose or low-pressure washer.

Suggested Product: Exterior Wood Cleaner


2. Let It Dry Completely
After cleaning, let the deck dry thoroughly. Recommended drying time is at least 48 hours. The wood should feel dry to the touch and be dry internally.

If you have one, a moisture meter can help confirm the moisture level is below 15%, ensuring proper stain absorption.


3. Sand the Surface if Needed
Sanding smooths the surface and opens the wood grain for better stain adhesion. It’s especially useful if the wood is rough or has remnants of old stain.

Use an orbital sander with 60–80 grit sandpaper. After sanding, carefully remove all dust.

Suggested Product: Orbital Sander


4. Choose the Right Stain
Your stain choice depends on your aesthetic preferences and desired protection level:

  • Semi-transparent: Preserves the natural look of the wood while protecting against UV and moisture.
  • Opaque: Offers full coverage and hides imperfections. Ideal for older or damaged decks.

At PontMasson, you’ll find trusted brands like Steina and SICO known for performance and durability.

Suggested Product: Steina Exterior Stain


5. Apply the Stain
Apply stain when the weather is stable, between 10°C and 25°C. Avoid applying in direct sunlight or just before rain.

Apply in the direction of the wood grain using a brush, roller, or stain applicator pad. Work in sections to avoid visible lines. Two thin coats are often better than one thick coat.

Follow the drying time between coats and check for a uniform finish.

Useful Accessories:

  • Stain Applicator
  • Stain Brush

6. Long-Term Maintenance
A well-maintained deck requires little effort each year, but regular care extends its life. Gently clean it in spring, check the finish, and touch up worn areas as needed.

Reapplication frequency depends on the stain type and climate, but every 2–3 years is generally recommended.


Conclusion
Preparing and staining your deck isn’t complicated if you follow the right steps. With professional-grade products and proper drying times, you’ll achieve a durable, attractive finish that stands up to the elements.

Visit PontMasson.com to explore our selection of stains, tools, and maintenance tips. Your deck will thank you!

Matériaux Pont Masson Blog

Build a Structure for a Rectangular Shade Sail

ow to Build a Structure for a Rectangular Shade Sail in Your Yard

Want to enjoy your yard without getting scorched by the sun? A rectangular shade sail is a simple, stylish, and effective way to create a cool and comfortable space. But to keep it secure and long-lasting, you’ll need a solid structure. Here’s a practical step-by-step guide to build your own.


Materials Needed

Materials:

  • 4 treated wood posts (4"x4") or metal (galvanized steel or aluminum)
  • Quick-set concrete (to anchor the posts)
  • Galvanized screws or bolts
  • Stainless steel cables or turnbuckles
  • Carabiners and mounting rings
  • Rectangular shade sail (e.g., 3x4 m or 4x5 m depending on your space)

Tools:

  • Shovel or auger
  • Drill/driver
  • Level
  • Socket wrenches
  • Measuring tape
  • Step ladder

Step 1: Choose the Right Location
Before you start, observe your yard:

  • Position the sail to maximize shade during peak sun hours
  • Choose a clear area without branches or obstacles
  • Ensure the ground is stable for post installation
    Tip: Plan for a slope of about 20% on one side of the sail to allow rainwater to drain.

Step 2: Mark and Dig Post Holes
Mark the four corners where the posts will go, accounting for the sail’s dimensions plus a few extra centimeters for tension.

  • Dig holes about 90 cm deep (or more depending on soil).
  • Insert the posts and align them using a level.
  • Pour concrete around each post and let it cure for 24–48 hours.
    Variation: You can attach two corners of the sail to solid walls and use only two posts for the other corners.

Step 3: Install the Mounts
Once the posts are secure:

  • Drill and install eye hooks or mounting rings at the top of each post.
  • Place them at slightly different heights to create the sail’s slope.
  • Attach cables or turnbuckles to the sail and connect them to the posts using carabiners.
  • Tensioning: Adjust the turnbuckles until the sail is taut, with no sagging or wrinkles.

Step 4: Customize and Maintain

  • Paint or stain the posts to protect them from weather and match your outdoor decor.
  • Clean the sail occasionally with mild soapy water.
  • Check the mounts after strong winds or storms.

In Summary
Installing a rectangular shade sail in your yard is a beginner-friendly project. With a bit of planning and quality materials, you’ll enjoy a stylish and durable shaded area all summer long—and beyond!

Matériaux Pont Masson Blog

How to Properly Maintain Your Cast Iron Skillet

How to Properly Maintain Your Cast Iron Skillet

The cast iron skillet is a must-have for cooking enthusiasts: sturdy, durable, and capable of delivering even heat—it can last a lifetime if properly cared for. Whether you’ve just bought one or want to revive an old model, here’s everything you need to know to maintain it correctly.


1. Seasoning: The Key to Longevity
Seasoning creates a natural non-stick surface and protects the iron from rust.
How to do it:

  • Clean your skillet (see below).
  • Warm it slightly to dry thoroughly.
  • Apply a thin layer of vegetable oil (canola, flaxseed, or sunflower).
  • Wipe off excess with a paper towel.
  • Place it upside down in a preheated oven at 200°C (400°F) for 1 hour (use foil underneath to catch drips).
  • Let it cool in the oven.
    Tip: Repeat 2–3 times if your skillet is new or rusty.

2. Gentle Cleaning
Forget the dishwasher and harsh detergents! Cast iron should be hand-washed right after use.
Simple method:

  • Rinse with hot water while still warm.
  • Use a non-abrasive brush or sponge.
  • For stuck-on food, add salt or gently scrape with a wooden spatula.
  • Dry immediately with a clean towel.
  • Apply a very thin layer of oil before storing.
    Avoid: soaking, repeated soap use, or storing while damp.

3. Storage: Dry and Lightly Oiled
Cast iron hates moisture.
Tips:

  • Store in a dry place.
  • If stacking, place a paper towel between skillets.
  • Lightly oil the interior after each use or cleaning.

4. What If It Rusts?
Don’t worry! Rust doesn’t mean your skillet is ruined.
Steps to restore:

  • Scrub rust with steel wool or a wire brush.
  • Clean and rinse thoroughly.
  • Repeat the seasoning process.

In Summary
Maintaining a cast iron skillet takes a bit of care, but it’s simple. Once properly seasoned and gently cleaned, it becomes your go-to tool for perfect searing and comforting slow-cooked meals.

Got an old skillet from grandma or a specific issue? Share your experience in the comments!

Matériaux Pont Masson Blog

How to Calculate Materials for Building a Pressure-Treated Wood Deck

How to Calculate Materials for Building a Pressure-Treated Wood Deck

Building a pressure-treated wood deck is a rewarding project that requires careful planning. Before grabbing your tools, you need to accurately estimate the materials. Here’s a practical guide to help you calculate everything you’ll need, with simple examples adaptable to any dimensions.


1. Define the Deck Area
Start by measuring the length and width of the deck to get the total square footage.
Formula:
Area = Length × Width
Example: A deck measuring 12 feet by 16 feet gives a total area of 192 square feet.


2. Calculate Decking Boards
The boards used measure 1-1/4" × 6", but the actual usable width is about 5-1/2 inches, or 0.458 feet.
Formula:
Linear feet required = Total area ÷ 0.458
Example:
192 ft² ÷ 0.458 = approx. 419 linear feet of boards.
Then, choose your board length (8', 10', 12', 14', or 16') to convert linear feet into board count.
Example:
419 ÷ 12 = approx. 35 boards of 12 feet.
Always plan for 10% extra for cuts and unexpected needs.


3. Calculate Joists
Joists are typically spaced 16 inches apart (1.33 feet). You’ll need one joist at each interval, plus one at each end.
Formula:
Number of joists = Deck width ÷ 1.33 + 1
Example:
For a 16-foot-wide deck:
16 ÷ 1.33 + 1 = approx. 13 joists.
Each joist should span the depth of the deck (e.g., 12 feet for a 12-foot-deep deck).


4. Calculate Beams and Posts
Beams:
The number depends on the span between supports (usually 6 to 8 feet). For a standard deck, install 2 to 3 beams parallel to the house.
Posts or Concrete Blocks:
Each beam needs a support every 6 to 8 feet.
Example:
For a 16-foot-wide deck, plan for about 6 to 9 posts depending on the structure.


5. Hardware and Accessories
Don’t forget:

  • About 30 to 40 wood screws per board.
  • 1 joist hanger per joist.
  • Beam anchors and other fasteners depending on your method.
  • Extra boards for finishing edges or skirting.

6. Quick Calculation Summary

  • Area = Length × Width
  • Linear feet of boards = Area ÷ 0.458
  • Number of boards = Linear feet ÷ chosen board length
  • Joists = Width ÷ 1.33 + 1
  • Beams = Based on span (usually 2 to 3)
  • Posts = 1 every 6 to 8 feet under each beam
  • Recommended surplus = 10% extra for each main material

Conclusion
By following these simple and flexible steps, you can adjust the calculations to any deck size. Always check your local building codes before starting construction.

Matériaux Pont Masson Blog

8 Common Painting Mistakes to Avoid When Decorating a Room

When painting a room, certain mistakes can compromise the final look and durability of the job. Here are the main errors to avoid and how to fix them:

  1. Not properly preparing the walls
    ❌ Mistake: Painting over dirty, damp, or uneven surfaces.
    ✅ Solution: Clean the walls (dust, grease), fill holes and cracks with filler, then sand for a smooth surface.

  2. Skipping the primer
    ❌ Mistake: Applying paint directly on raw walls or over dark colors.
    ✅ Solution: Use a suitable primer (plaster, wood, metal...) to improve adhesion and reduce the number of coats needed.

  3. Choosing low-quality paint
    ❌ Mistake: Using cheap paint that doesn’t cover well and deteriorates quickly.
    ✅ Solution: Invest in high-quality paint with good coverage and durability (especially for kitchens, bathrooms, washable surfaces...).

  4. Painting without protecting the room
    ❌ Mistake: Not covering floors, furniture, and baseboards, leading to hard-to-remove stains.
    ✅ Solution: Lay down a tarp, use masking tape for edges, and cover furniture with plastic sheeting.

  5. Applying too much paint at once
    ❌ Mistake: Overloading the roller or brush, causing drips and visible streaks.
    ✅ Solution: Apply several thin coats, cross strokes (horizontal then vertical), and let each layer dry properly.

  6. Painting in poor conditions
    ❌ Mistake: Painting in a room that’s too humid or too hot.
    ✅ Solution: Work in a well-ventilated room at a temperature between 15–25°C, and avoid days with high humidity.

  7. Ignoring drying times
    ❌ Mistake: Moving furniture back too soon or applying another coat before the previous one is dry.
    ✅ Solution: Follow the drying time indicated on the paint can (usually 6 to 24 hours between coats) to avoid marks and imperfections.

  8. Neglecting the finishing touches
    ❌ Mistake: Leaving visible lines or removing masking tape too late.
    ✅ Solution: Smooth edges with a light roller pass and remove masking tape before the paint fully dries to prevent peeling.

By avoiding these mistakes, you'll achieve a clean, even, and long-lasting result for your interior painting!

Matériaux Pont Masson Blog

7 Tips for Building a Chicken Coop in the City: Practical and Eco-Friendly Guide

Keeping chickens in the city? Yes, it’s possible!
In addition to providing fresh eggs, chickens help reduce organic waste and bring life to your urban garden. But how do you build a coop that suits an urban environment? Follow this guide for a project that’s stylish, practical, and animal-friendly.


1. Check Local Regulations

Before you begin, check with your city or municipality. Many cities allow chickens, but there may be restrictions on the number of birds (usually 2 to 4) and the size of the coop. Roosters are often prohibited due to noise.


2. Choose the Ideal Location

Even in the city, your chickens need a peaceful space. Prioritize:

  • A shaded area to avoid overheating in summer
  • Well-drained soil to prevent moisture buildup
  • A spot sheltered from wind, such as near a fence or wall

3. Plan the Coop Structure

A good chicken coop includes three essential zones:

  • Sleeping shelter: A closed space with roosts and nesting boxes. Plan about 1 m² for every 2 to 3 chickens.
  • Outdoor run: A fenced area where they can safely scratch the ground.
  • Storage space: For feed, bedding, and accessories.

Tip: You can find all necessary materials—framing wood, plywood panels, and chicken wire—at Pont Masson.


4. Ensure Chicken Comfort

To keep your chickens happy:

  • Install roosts (about 30 cm per chicken)
  • Provide one nesting box for every 2 to 3 chickens, lined with straw
  • Ensure good ventilation without drafts
  • Set up a feeder and waterer protected from the elements

5. Make Cleaning Easy

Cleanliness is essential in urban settings to avoid odors and pests.

  • Use absorbent bedding (like wood shavings available at Pont Masson) and change it regularly
  • Clean the shelter weekly
  • Store feed in airtight containers

6. Think About Aesthetics

Your coop can blend beautifully into your urban garden:

  • Paint it in neutral or pastel tones (exterior paints available at Pont Masson)
  • Add a green roof for insulation and style
  • Create a small stone path for easy access to the run

7. Enjoy the Benefits

With a small urban chicken coop, you’ll enjoy:

  • Fresh eggs—often tastier and more nutritious
  • Reduced organic waste (chickens love peels!)
  • A touch of nature in the heart of the city

Conclusion: A Little Bit of Country in the City

Building an urban chicken coop is an accessible project that combines ecology, food autonomy, and animal welfare. With a bit of planning and the right materials—like those available at Pont Masson—your chickens will be happy, and so will you!

Matériaux Pont Masson Blog

How to Install a Baseboard Heater for Efficient Heating

Installing a baseboard heater is an effective way to heat your home, especially in regions with harsh winters like Québec. These units provide even heat and are relatively easy to install. Here’s a step-by-step guide to help you install a baseboard heater in your home.


Why Choose a Baseboard Heater?

Baseboard heaters offer several advantages:

  • Energy Efficiency: They convert nearly all consumed energy into heat.
  • Simple Installation: With basic tools, you can install them yourself.
  • Even Heating: They distribute heat evenly throughout the room.

Steps to Install a Baseboard Heater

1. Choose the Location

Install the heater along an exterior wall—often called a “cold wall”—to counter heat loss. Make sure to leave at least 6 inches of space above the unit for proper air circulation.

2. Turn Off the Power

Before starting, turn off the power at the main panel to avoid any risk of electric shock.

3. Mount the Heater to the Wall

Use the pre-drilled holes on the unit to securely attach it to the wall. Ensure the heater is level for optimal performance.

4. Connect the Electrical Wires

Connect the heater wires to the power supply wires, following local electrical codes. If you’re not comfortable with electrical work, it’s best to hire a professional.

5. Install the Thermostat

Some heaters come with a built-in thermostat, while others require a separate installation. Follow the manufacturer’s instructions for proper setup.

6. Restore Power and Test the Unit

Once installation is complete, turn the power back on and test the heater to ensure it’s working properly.


How to Determine the Right Power Rating for Your Heater

Use the following formula to calculate the required wattage:

Power (W) = Room Area (m²) × Heating Requirement (W/m²)

Heating Requirement varies based on insulation:

  • Well-insulated home: 80–100 W/m²
  • Average insulation: 100–120 W/m²
  • Poor insulation: 120–150 W/m²

Example:
For a 15 m² room with average insulation:
15 m² × 100 W/m² = 1500 W

You would need a baseboard heater of approximately 1500 W to heat this room efficiently.


Additional Tips

  • Install on an Exterior Wall: Placing the heater under a window helps counter cold drafts.
  • Regular Maintenance: Clean the heater to prevent dust buildup and maintain performance.

By following these steps and using the right formula to determine the required power, you’ll enjoy efficient and comfortable heating all winter long.

Matériaux Pont Masson Blog

How to Identify the Different Grades of Eastern White Pine Boards

Eastern White Pine is valued for its strength, fine texture, and versatility. Widely used in construction, cabinetry, and interior finishing, understanding the different grades available helps you choose the right boards for your project. Here’s a practical guide to help you identify these grades:


1. Select Grade

The Select grade is the highest category for Eastern White Pine. It’s ideal for premium projects where aesthetics are a priority.

  • Appearance: High-quality boards with a defect-free face, though the back may show more variation.
  • Uses: Fine woodworking, moldings, high-end furniture.
  • Advantages: Smooth finish requiring minimal prep before painting or staining.

2. Grades #1 & #2 (Sound Knots)

These grades feature visible but solid knots, offering a balance between appearance and functionality.

  • Appearance: Knotty wood with a pleasing look, suitable for visible applications.
  • Uses: Flooring, interior paneling, furniture, siding, cornices, trim, roof edges, and other exterior uses.
  • Advantages: Good durability with a natural, warm appearance.

3. Appearance Grade

This grade offers a rustic look with more character—perfect for projects where visual charm outweighs perfection.

  • Appearance: Rustic wood with character, ideal for projects that embrace these qualities.
  • Uses: Paneling, siding, rustic furniture, outdoor projects like fences, garden furniture, crates, cladding, and various industrial applications.
  • Advantages: Rustic aesthetic, affordable price, ideal for a natural style.

Finishing and Post-Purchase Treatment

Regardless of the grade chosen, final treatment (sanding, staining, sealing) can greatly enhance the appearance and durability of the boards.

  • For a modern look: Choose Select grade with light stain or white paint.
  • For a rustic style: Opt for Appearance grade with a dark stain.

Conclusion: Choosing the Right Grade for Your Project

The choice of Eastern White Pine grade depends mainly on your budget, intended use, and aesthetic preferences. For refined projects, go with Select. For rustic or functional styles, Grades #1 & #2 or Appearance grade are perfectly suited.

Do you have a project in mind and need help choosing the right grade? Feel free to share your ideas in the comments!