Facebook Pixel

Tagged with 'Products'

Matériaux Pont Masson Blog

Why Choose Tricera Brackets for Your Patio Structure?

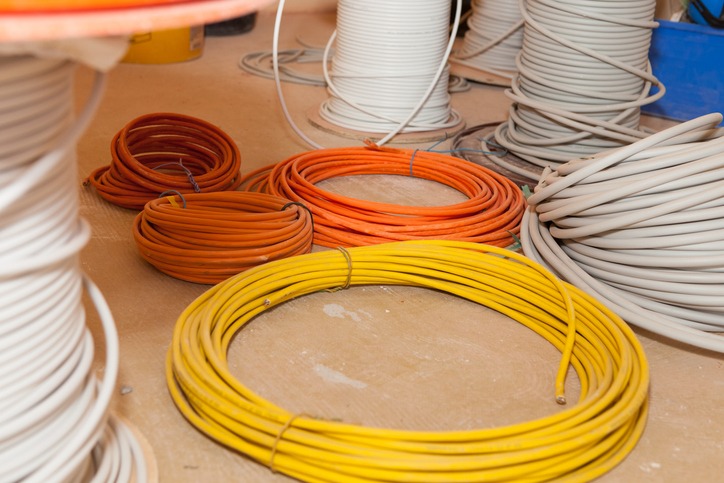
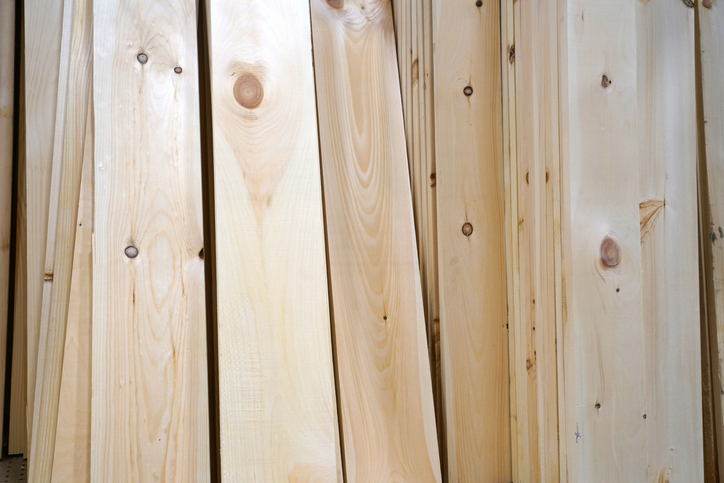
Outdoor structures need to withstand harsh weather, temperature fluctuations and years of exposure to the elements. Traditional wood framing can require frequent maintenance, including staining, replacing damaged boards and correcting structural movement over time.

Tricera galvanized steel systems offer a durable and modern alternative designed for the realities of Quebec and Ontario climates. Whether you are building a ground-level patio, an elevated deck or a custom outdoor project, Tricera brackets and framing systems provide strength, precision and long-term reliability.

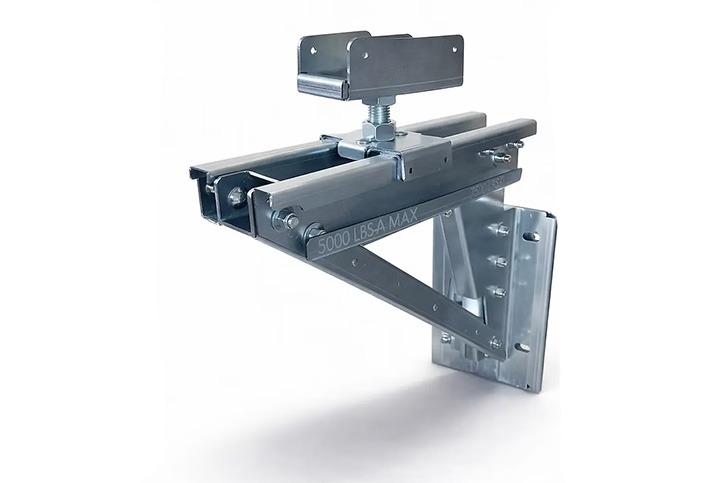
What Are Tricera Brackets?

Tricera is a modular galvanized steel framing system designed for residential and commercial outdoor projects. Unlike traditional wood framing methods, Tricera components are manufactured using G90 galvanized steel and assembled mechanically for a precise and durable structure.

The result is a strong and stable framing system built to last for decades with minimal maintenance.

Why Is Galvanized Steel a Good Choice?

Galvanized steel includes a protective coating that helps prevent rust and corrosion. This makes it an excellent material for outdoor installations exposed to rain, snow, humidity and freeze-thaw cycles.

Galvanized steel framing also provides excellent structural stability and load capacity while requiring very little maintenance over time. For many homeowners, it represents a more durable long-term solution than traditional wood framing.

Frequently Asked Questions About Tricera Systems

Do Tricera Structures Rust?

Tricera components are made from G90 galvanized steel, designed to offer excellent corrosion resistance. This allows the structure to better withstand the demanding climate conditions found across Quebec and Ontario.

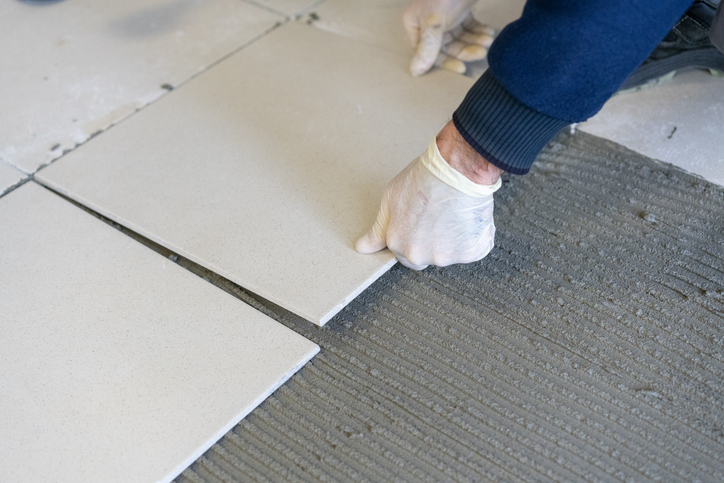
Can Different Decking Materials Be Installed?

Yes. Tricera systems are compatible with a variety of finishing materials depending on the style and needs of the project. Treated wood, natural wood, composite decking and some aluminum systems can all be installed over the structure.

This flexibility makes it easy to create a customized outdoor space without compromising durability or structural integrity.

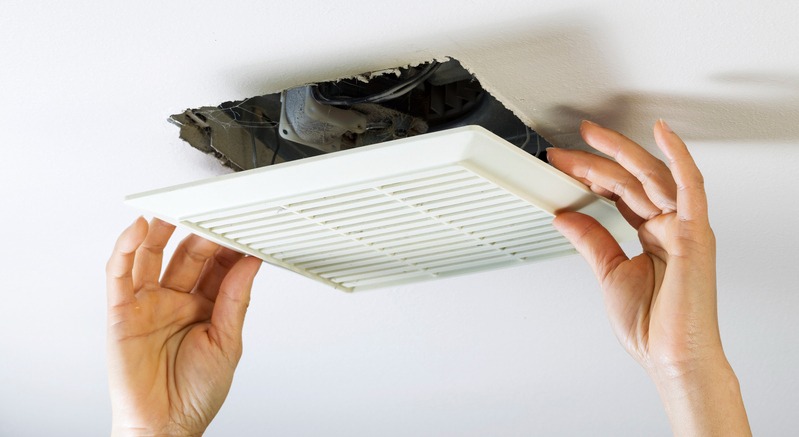
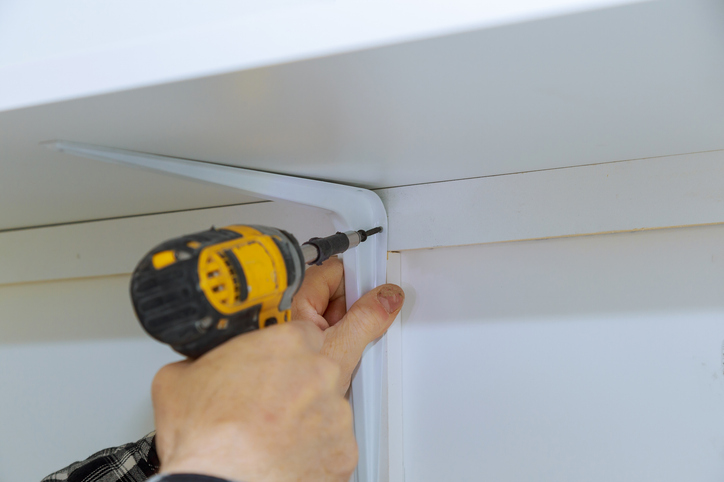
Is Installation Complicated?

Tricera systems are designed to simplify installation through modular construction and precision manufacturing.

Many components arrive pre-engineered for fast assembly, helping reduce installation time while improving structural consistency.

Why Are Tricera Brackets Popular for Patio Projects?

Tricera brackets help create strong, stable and precise patio structures. Their design simplifies framing while ensuring excellent support and long-term performance.

They are especially appreciated for residential deck projects because they help maintain a straight and level structure over time while reducing many of the maintenance issues associated with traditional wood framing.

Do Tricera Structures Require Maintenance?

One of the main advantages of galvanized steel framing is the minimal maintenance required.

Unlike traditional wood structures, galvanized steel will not rot or warp from moisture exposure. The structure remains stable over time and does not require frequent structural repairs. Maintenance requirements will mainly depend on the surface material selected for the deck itself.

Can a Tricera Structure Be Expanded Later?

Yes. The modular concept allows many projects to be modified or expanded over time.

This flexibility can be useful when enlarging a patio, modifying an access point or adapting the outdoor layout to changing needs.

Why Choose Steel Framing Instead of Wood?

Wood remains a popular building material, but many homeowners are now looking for more durable and low-maintenance alternatives.

Traditional wood framing can shift over time and is more vulnerable to moisture and long-term deterioration. It also requires ongoing maintenance to preserve its appearance and structural integrity.

Tricera galvanized steel framing offers excellent stability, moisture resistance and long-term durability. Because it does not rot, it provides a reliable low-maintenance solution for outdoor living spaces.

What Types of Projects Can Be Built With Tricera?

Tricera modular systems can be used for many outdoor applications, including ground-level patios, elevated decks, balconies and commercial platforms.

Thanks to their modular design, they can adapt easily to different layouts and terrain conditions.

Designed for Quebec and Ontario Weather

Freeze-thaw cycles, humidity and harsh winters can place significant stress on outdoor structures.

Tricera systems are designed to handle these conditions through galvanized steel construction, robust engineering and precise mechanical assembly. The result is a stable and durable outdoor structure built for long-term performance in Canadian climates.

Conclusion

Choosing Tricera means investing in a durable and modern outdoor framing solution designed for the weather conditions of Quebec and Ontario.

Whether you are planning a new patio or an elevated deck, Tricera brackets and galvanized steel framing systems provide a strong and low-maintenance alternative to traditional wood structures.

Matériaux Pont Masson Blog

How to Build a Modern Outdoor Privacy Screen

Creating a stylish and durable privacy screen has never been easier thanks to modular systems available at Pont-Masson. By combining aluminum posts, treated wood boards, and U-channels, you can achieve a sleek, weather-resistant, and modern look.


Materials Needed

For this project, you’ll need:

  • 72-inch U-channel system (pack of 2)
  • 5/4’’ x 6’’ treated wood boards (depending on desired height and width)
  • 3’’ x 3’’ x 76’’ black aluminum posts

Why choose these materials?

  • Aluminum: rust-proof, strong, and modern-looking
  • Treated wood: easy to cut and stain
  • U-channels: allow boards to slide in easily with no visible screws

Required Tools

  • Drill/driver
  • Level
  • Measuring tape
  • Saw (if adjustments are needed)
  • Pencil

Step-by-Step Instructions

1. Plan the layout

Determine the total length of your screen and the number of sections required.
Each 5/4’’ x 6’’ board covers approximately 5 1/4’’ in width.


2. Install the aluminum posts

Secure the posts:

  • Directly onto a concrete slab (using anchors)
  • Or into the ground

Make sure they are perfectly level and evenly spaced.


3. Install the U-channels

Attach the U-channels inside the posts:

  • One on each side to create a groove
  • These will guide the boards into place

4. Insert the treated wood boards

Slide the boards into the channels:

  • Adjust height using spacers if needed
  • Trim slightly for a perfect fit

5. Final assembly

Once the boards are in place:

  • Add a few discreet screws for extra stability
  • Check overall alignment

Pro Tips

  • Leave a small gap at the bottom to avoid ground contact and allow airflow
  • Use a level at every step for a professional finish
  • Combine multiple sections to create a full wall
  • Add outdoor lighting for a premium nighttime effect

Design Ideas

  • Install near a spa or relaxation area
  • Use as a semi-detached patio divider
  • Add climbing plants to soften the modern look
  • Mix with wood elements for a warm contrast

Benefits of This Type of Screen

  • Quick installation (no complex structure required)
  • Low maintenance
  • Excellent durability in harsh climates
  • Highly sought-after modern design

Conclusion

This type of privacy screen is an ideal solution for creating a stylish and intimate outdoor space. With materials available at Pont-Masson, you can transform your backyard into a modern retreat—in just one weekend.

Matériaux Pont Masson Blog

Discover Neosol products for lawn care

In the spring, many homeowners take advantage of the warmer weather to restore their yard. After winter, lawns often need some attention to regain their density, colour and overall health.

To make lawn maintenance easier, certain solutions have been specifically developed for our climate. Neosol products, available at Pont-Masson, are designed to help homeowners care for their lawns throughout the season. Developed for North American conditions, these products aim to simplify lawn care while helping achieve better results.


A brand designed for our climate

Neosol products were developed with the expertise of agronomists to offer solutions adapted to the climate conditions of Quebec and other northern regions.

The goal is to make lawn care easier and more accessible for homeowners. The product line includes several solutions designed to:

  • nourish the lawn

  • improve turf density

  • support healthy growth

  • help grass better resist environmental conditions

These products are generally easy to apply and can be integrated into a seasonal lawn care routine.


Solutions to nourish your lawn

Among the most popular products in the Neosol line are liquid fertilizers designed to support active lawn growth.

For example, the 25-0-3 liquid lawn fertilizer is formulated to promote greener, denser grass during the growing season. Its high nitrogen content helps stimulate greening while added biostimulants support nutrient absorption.

This type of fertilizer is typically applied when:

  • the snow has completely melted

  • the ground has thawed

  • the lawn begins to turn green

In northern climates like Quebec, the first application is usually done in the spring as the lawn begins to grow again.


Grass seed for repairing or improving lawns

In addition to fertilizers, the Neosol lineup also includes grass seed mixes designed to improve lawn density.

These seed blends can be used to:

  • repair damaged areas

  • overseed an existing lawn

  • establish a new lawn

The mixes are formulated to provide good resistance to foot traffic and climate conditions while promoting healthy growth.

A denser lawn can also help reduce the presence of weeds.


Simple solutions for seasonal lawn maintenance

Neosol also offers complete solutions designed to make lawn care easier throughout the season.

For example, some seasonal kits include several fertilizer applications and accessories needed to maintain your lawn from spring through fall. These kits are designed to simplify the process and help homeowners follow a consistent lawn care routine.

Each application typically covers several thousand square feet, making these products suitable for most residential properties.


A simple approach to keeping your lawn healthy

With regular care, it is possible to gradually improve the health and appearance of your lawn. Neosol products are designed to support homeowners throughout the season with solutions that are simple to use.

By combining fertilization, seeding and regular maintenance, you can encourage a lawn that is denser, stronger and better adapted to our climate.

Neosol products, available at Pont-Masson, offer a practical solution for homeowners who want to maintain their lawn themselves while achieving reliable results season after season.


Matériaux Pont Masson Blog

How to Identify Electrical Wire Types in Canada

Warning – Electrical Safety
The information provided in this article is for general informational purposes only. Electrical work must comply with the Québec Construction Code and, in some cases, be performed by a certified master electrician. When in doubt, consult a qualified professional.


Choosing the right electrical wire is essential for safety, code compliance, and performance. In Canada, electrical wires are identified by their color, gauge, and designation (e.g. 14/2, 12/3), which can be confusing if you’re not familiar with these standards.

This guide will help you understand and identify the most common electrical wire types used in Canadian homes.


Understanding Wire Designations: 14/2, 12/3, etc.

Designations such as 14/2 or 12/3 provide two key pieces of information:

1. Wire Gauge (First Number)

The gauge refers to the thickness of the conductor, measured using the AWG (American Wire Gauge) system.

The smaller the number, the thicker the wire and the higher the amperage it can carry.

Gauge Max Amperage Common Uses
14 AWG 15 A Lighting, standard outlets
12 AWG 20 A Kitchen, bathroom
10 AWG 30 A Dryer, water heater
8 AWG 40 A Range
6 AWG 55 A Oven, subpanel

2. Number of Conductors (Second Number)

The second number indicates the number of insulated conductors, not including the ground wire.

  • 14/2 = 2 insulated conductors + 1 ground wire

  • 12/3 = 3 insulated conductors + 1 ground wire

“/3” cables are commonly used for:

  • three-way switches

  • appliances requiring two hot wires

  • shared circuits


Electrical Wire Colors (Canadian Standards)

Wire color indicates the function of each conductor in a circuit.

Color Function
Black Hot (live)
Red Secondary hot
White Neutral
Green or bare copper Ground

Important: A white wire may sometimes be used as a hot wire if it has been re-identified with black or red tape.


Outer Sheath Color (NMD90 Cable)

In Canada, residential NMD90 cables are often identified by the color of the outer sheath.

Sheath Color Gauge
White 14 AWG
Yellow 12 AWG
Orange 10 AWG

This color coding helps with quick identification on job sites, but always verify the printed markings on the cable.


Common Types of Electrical Wire

NMD90

  • Indoor residential use

  • Dry walls and ceilings

  • Most common household wiring

BX / AC

  • Metal-clad cable

  • Impact-resistant

  • Often used in basements

TECK / RW90 Wire

  • Outdoor or industrial use

  • Moisture-resistant

  • Surface-mounted or installed in conduit


Choosing the Right Wire: Common Mistakes to Avoid

❌ Using 14 AWG wire on a 20 A breaker
❌ Relying only on color without checking the designation
❌ Mixing wire gauges on the same circuit

✔️ Always match wire gauge to breaker amperage
✔️ Read cable markings carefully
✔️ When in doubt, ask for expert advice


Summary

  • Wire gauge determines current capacity

  • Number of conductors depends on application

  • Colors indicate wire function

  • Sheath colors aid quick identification

  • Code compliance is essential for safety


Need Help With Your Electrical Project?

The Pont-Masson team can help you choose the right electrical wire based on:

  • your project needs

  • current electrical codes

  • your experience level

Visit us in store or browse www.pontmasson.com to find a wide selection of electrical wire, boxes, breakers, and accessories.

The right wire means a safer, longer-lasting installation.

Matériaux Pont Masson Blog

Sones and CFM: How to Choose the Right Kitchen Range Hood or Bathroom Fan

When shopping for a kitchen range hood or a bathroom exhaust fan, two technical terms often come up: sones and CFM. While they may sound complex at first, these numbers are essential to choosing an appliance that is efficient, quiet, and well-suited to your space.

At Pont-Masson, we believe that making the right choice starts with understanding the basics. Here’s a simple guide to help you shop with confidence.


What Does CFM Mean?

CFM (Cubic Feet per Minute) measures the amount of air an appliance can move in one minute. The higher the number, the more powerful the unit.

Why CFM Matters

  • It determines how effectively air is exhausted

  • It affects the removal of:

    • moisture

    • odors

    • smoke

    • grease

Recommended CFM by Application

For a Kitchen Range Hood

  • 300 to 400 CFM: light cooking (electric cooktop, occasional use)

  • 450 to 600 CFM: regular cooking, gas cooktops

  • 600 CFM and up: heavy cooking, large kitchens, or island installations

Tip: The more powerful your cooktop, the higher the CFM your range hood should have.

For a Bathroom Fan

  • 50 to 80 CFM: small bathroom or powder room

  • 80 to 110 CFM: standard-sized bathroom

  • 110 CFM and up: large bathrooms or rooms with glass showers or high ceilings

Simple rule: plan for about 1 CFM per square foot of bathroom space.


What Are Sones?

Sones measure the noise level of a fan or hood. The lower the sone rating, the quieter the appliance.

Understanding Sone Levels

  • 0.5 to 1 sone: very quiet (barely noticeable)

  • 1 to 2 sones: quiet and comfortable

  • 3 sones and above: clearly audible


Finding the Right Balance Between Power and Noise

A powerful appliance that is too loud often ends up being underused. The goal is to find the right balance between CFM and sones.

General Recommendations

Kitchen Range Hoods

  • Aim for under 3 sones at normal operating speed

  • Multi-speed models offer greater flexibility

  • A hood that is wider than the cooktop captures smoke more efficiently, reducing the need for excessive power

Bathroom Fans

  • 1.5 sones or less for optimal comfort

  • Ideal for daily or nighttime use

  • Quieter fans are more likely to be left running long enough to properly remove moisture


Other Factors to Consider

  • Proper ducting: poor duct installation reduces performance and increases noise

  • Installation type: wall-mounted, under-cabinet, ceiling-mounted, or island

  • Additional features:

    • timer

    • humidity sensor

    • LED lighting

    • washable filters


In Summary

Feature What to Remember
CFM Measures airflow power
Sones Measures noise level
Kitchen Focus on power with controlled noise
Bathroom Focus on quiet operation with adequate airflow

Need Help Choosing?

The Pont-Masson team is here to help you select the right product based on:

  • room size

  • usage habits

  • budget

  • comfort preferences

Visit us in store or browse www.pontmasson.com to discover a wide selection of kitchen range hoods and bathroom fans for every project.

Make the right choice today for cleaner, healthier air tomorrow.

Matériaux Pont Masson Blog

How to Choose Eco-Friendly Paint for a Healthier Home

When repainting a room, choosing the right color is often the first thing that comes to mind. But the type of paint you select can have a major impact on your indoor air quality and on the environment. Conventional paints release volatile organic compounds (VOCs), chemicals that can linger in the air long after the paint has dried. Eco-friendly paints offer a safer and more responsible alternative, allowing you to refresh your living space without compromising your health or the planet.

Why eco-friendly paint is worth choosing

Traditional paints can release significant amounts of VOCs, which may cause headaches, irritation, respiratory issues or discomfort for sensitive individuals such as children or people with asthma. Low-VOC or zero-VOC paints greatly reduce these emissions, resulting in cleaner air and a healthier home environment.

Eco-friendly paints also limit the use of petrochemical solvents and toxic ingredients. Their formulas are developed with environmental responsibility in mind, and some brands even offer recycled or naturally derived options. These products minimize the environmental footprint of your renovation project while still delivering excellent performance.

One major benefit of eco-friendly paints is their improvement over the years. Modern formulations provide outstanding coverage, smooth finishes, long-lasting durability and a wide range of colors. They also tend to dry faster and emit significantly fewer odors, making the painting experience much more pleasant.

How to identify truly eco-friendly paint

Several indicators can help you recognize an environmentally responsible paint.

Water-based paints, such as latex or acrylic formulas, contain fewer harmful solvents and are easier to work with than oil-based paints. They are less polluting, easier to clean and emit fewer chemicals.

The “low-VOC” or “zero-VOC” labels are among the most important things to look for. Low-VOC paints contain a reduced level of volatile organic compounds, while zero-VOC paints contain almost none. These designations help you quickly identify safer and more sustainable options.

Some products carry eco-label certifications. These labels ensure that the paint meets strict standards related to emissions, composition, environmental impact and durability. They are a reliable indicator that the product has been evaluated and approved according to high environmental requirements.

Natural paints are another category worth considering. These paints use ingredients like clay, lime, plant-based oils or mineral pigments. They represent an even greener option and are perfect for homeowners who want to avoid chemical-based products entirely.

Tips for using eco-friendly paint effectively

Even when choosing a healthier paint, certain best practices ensure successful results.

Proper ventilation during and after application helps speed up drying and dissipate any remaining odors. Preparing the surface is essential: cleaning walls, patching cracks and lightly sanding ensures a smoother finish and better adhesion.

It is also important to select the right paint for each room. High-humidity areas like kitchens and bathrooms require specialized formulations with better resistance to moisture. Living rooms and bedrooms, on the other hand, benefit from low-odor, soft-finish paints that create a more comfortable atmosphere.

Finally, disposing of leftover paint responsibly is essential. Most cities provide recycling programs or drop-off points for paint products. Returning unused paint helps reduce environmental impact and supports recycling programs.

Conclusion

Choosing eco-friendly paint is a meaningful step toward creating a healthier and more sustainable living environment. It reduces harmful emissions, improves air quality and minimizes environmental impact — all while delivering strong performance and beautiful results. Whether you’re refreshing a single room or renovating your entire home, eco-friendly paint is a smart and responsible choice.

At pontmasson.com, we support renovation projects that combine quality, comfort and environmental responsibility. The right paint can transform your space and contribute to a cleaner, healthier future.

Matériaux Pont Masson Blog

Manubric: Transform Your Walls with Style

Dreaming of a brick or stone feature wall without the complexity of traditional masonry?
Manubric offers the perfect balance of authenticity, simplicity, and long-lasting design. Made in Quebec, these decorative stones and bricks can elevate any space — indoors or outdoors — with a warm and natural look.


What Is Manubric?

Manubric is a Quebec-based company specializing in lightweight decorative stone and brick.
Each piece is molded from real stones or bricks, then hand-coloured to replicate natural textures and tones.

The result: a beautiful, durable wall covering that installs easily and looks impressively realistic.

Because the products are made from lightweight and resilient materials, they can be applied to drywall, concrete, wood, and more. Their design makes them an accessible decorative solution, even for beginners.


The Advantages of Manubric Products

1. Remarkably realistic

Manubric stones and bricks closely mimic the appearance of natural stone or traditional brick, without the weight, structural requirements, or higher installation costs.

2. Easy to install

Designed with simplicity in mind, these products can be installed using standard mortar and basic tools.
No need to hire a mason — with a few steps, you can achieve a professional-quality finish.

3. Versatile and durable

Whether it’s for a living-room feature wall, a rustic kitchen, or an elegant exterior upgrade, Manubric products resist moisture, frost, and everyday wear.

4. A local and eco-friendly choice

Proudly made in Quebec, Manubric supports local manufacturing and reduces transportation impacts.
Their production process minimizes waste and ensures long-lasting materials.


Where to Use Manubric in Your Home

  • Living room: a brick feature wall for an industrial or loft-style atmosphere.

  • Kitchen: rustic charm behind the counter or around cabinetry.

  • Entryway: a stone accent wall for a warm, inviting look.

  • Exterior: durable cladding for walls, chimneys, or columns.


Conclusion

Choosing Manubric means opting for a decorative solution that is authentic, local, and easy to install.
At Pont Masson, you’ll find the Manubric products along with expert advice to help you complete your project confidently.

Matériaux Pont Masson Blog

How to Replace a Toilet: Step-by-Step Guide

Replacing a toilet is a simple home project that many homeowners can do themselves with the right tools and preparation. Whether you’re upgrading your bathroom or replacing an old model, here’s how to do it efficiently.

1. Gather your tools and materials

Before you begin, make sure you have:

  • A new toilet (tank and bowl)

  • A new wax or rubber seal

  • An adjustable wrench

  • A putty knife

  • A level

  • Gloves and rags

Pont Masson Tip: You’ll find all the tools and supplies you need in store, including experts to answer your questions!

2. Remove the old toilet

  1. Shut off the water supply and flush to empty the tank.

  2. Disconnect the water line.

  3. Unscrew the bolts at the base.

  4. Gently lift the toilet (two people makes it easier).

  5. Remove the old wax ring and clean the floor flange.

3. Install the new seal

Place the new wax or rubber seal on the flange, making sure it’s centered.

4. Position the new toilet

  • Align the holes with the bolts.

  • Press down firmly to seat the seal.

  • Tighten the bolts evenly (don’t overtighten).

  • Check that the toilet is level.

5. Reconnect the water and test

  • Reattach the water supply line.

  • Turn the water back on.

  • Let the tank fill and check for leaks.

6. Final touches

  • Trim any excess bolts.

  • Replace the bolt caps.

  • Seal around the base with silicone if desired.

Conclusion

Replacing a toilet yourself is an easy and affordable way to update your bathroom. Follow these simple steps for a clean, durable result — and visit Pont Masson for all your plumbing essentials.

Matériaux Pont Masson Blog

Home Toolbox Essentials

Introduction

Having a well-stocked toolbox at home is the key to being prepared for small repairs, DIY projects, or household emergencies.
Whether you’re just starting out or you’ve been handy for years, some tools are simply essential. Here’s a list of must-haves every home should have.


1. Basic Tools

  • Hammer – for hanging frames, driving nails, or adjusting parts.

  • Screwdrivers (flat and Phillips head) – essential for assembling or taking things apart.

  • Pliers (adjustable and cutting) – perfect for gripping, cutting, or bending materials.

  • Adjustable wrench – useful for tightening or loosening nuts and bolts of different sizes.


2. Measuring and Marking Tools

  • Measuring tape – for accurate measurements before cutting or drilling.

  • Level – ensures your shelves, frames, and furniture are perfectly straight.

  • Carpenter’s square – to check right angles and make precise markings.

  • Carpenter’s pencil – for marking points and cutting lines.


3. Power Tools

  • Drill-driver – a must-have for assembling furniture or drilling into walls.

  • Jigsaw – great for cutting wood, plastic, or plywood.

Tip: Invest in rechargeable batteries and keep a set of drill bits for different materials.


4. Accessories and Supplies

  • Screws, nails, and wall plugs – keep an assortment of sizes on hand.

  • Duct tape, strong glue, and lubricant (like WD-40) – ideal for quick fixes.

  • Flashlight – essential for dark corners or power outages.


5. Safety First

Never skip safety gear:

  • Work gloves to protect your hands.

  • Safety goggles to guard against dust and debris.

  • Dust mask for cutting or sanding projects.


Conclusion

A good toolbox is an investment in peace of mind.
With these essentials on hand, you’ll be ready to tackle most home repairs and small projects with confidence and ease.

Matériaux Pont Masson Blog

Why Choose Ceramic Tile?

Introduction

Ceramic tiles remain one of the most popular materials in both construction and renovation. Durable, versatile, and stylish, they fit perfectly in kitchens, bathrooms, entrances, and even commercial spaces.
However, achieving long-lasting beauty depends not only on choosing the right tile but also on how it’s installed. Proper preparation of the subfloor and careful installation make all the difference.
In this guide, discover the advantages of ceramic tile, the key installation steps, and pro tips to ensure a professional and lasting result.


Why Choose Ceramic Tile?

1. Exceptional Durability

Ceramic tiles are resistant to wear, impact, moisture, and stains. Once installed correctly, they can maintain their beauty for decades, making them ideal for high-traffic areas such as hallways, kitchens, and bathrooms.

2. Variety of Styles and Finishes

Ceramic tiles come in countless colors, sizes, and textures—wood, stone, marble, or concrete effects. Whatever your style, from classic to modern, there’s a tile to match it.

3. Easy to Maintain

Unlike other floor coverings, ceramic tiles don’t trap dust or allergens. A simple wipe with a damp mop keeps them clean. They’re also heat resistant, which makes them compatible with underfloor heating systems.

4. Excellent Value for Money

Although installation can be more labor-intensive, ceramic tiles offer great long-term value. Their longevity and low maintenance easily offset the initial investment.


Preparing the Surface: The Most Crucial Step

Proper subfloor preparation is essential for a flawless tile installation. An uneven or unstable base can cause cracking or tile detachment over time.

  • Check levelness and rigidity of the subfloor (OSB, plywood, or concrete).

  • Use a decoupling membrane or an OSB subfloor with a polyethylene barrier to prevent movement and protect against moisture.

  • Clean the surface thoroughly before applying adhesive or mortar to ensure maximum bonding.


Main Steps for Ceramic Tile Installation

1. Layout Planning

Before applying adhesive, plan your layout to determine the starting point, alignment, and joint spacing. Good planning prevents narrow cuts and ensures a balanced visual result.

2. Applying the Mortar or Adhesive

Spread the thinset mortar evenly using a notched trowel appropriate to the tile size. For large-format tiles, use a double-bonding method—apply adhesive on both the floor and the back of the tile.

3. Setting and Aligning the Tiles

Lay each tile following the layout pattern. Use spacers to maintain uniform joint widths and check alignment regularly with a level.

4. Grouting

Once the mortar has set, apply grout diagonally across the tiles using a rubber float. Clean excess with a damp sponge before it dries completely.

5. Final Cleaning and Protection

After the grout has fully cured, clean the entire surface carefully. In damp areas, applying a sealant can enhance protection against stains and moisture infiltration.


Common Mistakes to Avoid

  • Skipping surface leveling before installation.

  • Using the wrong type of adhesive or mortar.

  • Forgetting expansion joints along walls or columns.

  • Installing tiles over a damp or unsealed floor.


Pro Tips for a Perfect Finish

✅ Maintain room temperature between 18°C and 25°C (64°F–77°F).
✅ Check subfloor humidity before installation.
✅ Sort tiles by size and shade before laying them.
✅ Clean regularly with gentle, non-abrasive products.


Conclusion

Choosing ceramic tile means investing in durability, beauty, and easy maintenance.
When combined with a stable OSB subfloor and a polyethylene membrane, it provides superior protection against moisture and structural movement.
A well-prepared base and meticulous installation will ensure a strong, elegant floor that enhances your home’s value for years to come.

Matériaux Pont Masson Blog

How to Install Shelves on a Drywall Wall — Practical Guide

Want to add a bit of storage or style to your space without too much effort? Installing wall shelves is a simple, effective, and aesthetic solution. However, when working with drywall (gypsum board), it’s best to proceed carefully to avoid unpleasant surprises.

Here’s a step-by-step practical guide to help you achieve a clean, level, and secure installation.


Required Materials

Tools:

  • Measuring tape

  • Level (bubble or laser)

  • Pencil

  • Drill-driver

  • Drywall drill bits

  • Screwdriver

  • Masking tape

  • Stud finder (recommended)

Materials:

  • Shelf (or shelves)

  • Brackets or invisible mounts

  • Alligator anchors (recommended)

  • Plastic wall plugs (optional)

  • Screws


Step 1 – Planning

Before drilling, take a moment to plan:

  • Where exactly do you want to place the shelf?

  • Will it hold decorative items or heavier loads?

  • Can you screw into a wall stud? (This increases strength.)

Tip: Use a stud finder to locate solid points behind the wall. If you don’t have one, gently tap on the wall — a duller sound indicates a stud.


Step 2 – Draw Straight Reference Lines

  • Apply masking tape to the wall at the approximate shelf height.

  • Use your level to draw a perfectly straight line along the tape.

  • Mark where each bracket will go, ensuring they’re at the same height.

Tips for perfect alignment:

  • A laser level gives precise horizontal lines.

  • Fix one bracket first, place the shelf on it, and adjust the second bracket before drilling.

  • If installing multiple shelves, use a small cardboard or wood template to mark consistent heights.


Step 3 – Drill and Insert Anchors

If you can’t screw directly into a stud, use alligator anchors—they provide strong support in drywall.
Plastic anchors can work for lighter loads but are less durable.

  • Drill holes at your marked spots.

  • Insert the alligator anchors.

  • Screw gently so the anchor expands and locks securely into the wall.


Step 4 – Attach the Brackets

  • Screw the brackets into the anchors (or directly into a stud, if available).

  • Use your level to confirm they’re straight before tightening the screws fully.


Step 5 – Install the Shelf

  • Place the shelf on the brackets.

  • If there are pre-drilled holes, secure the shelf from underneath using short screws.

  • Do one final level check — and you’re done!


Extra Tips

  • Space multiple shelves evenly (12–16 inches apart, depending on use).

  • For heavy loads (books, dishes), use alligator anchors and try to secure at least one screw into a stud.

  • For a minimalist look, choose invisible mounts, though they require more precise installation.


In Summary

Installing shelves on drywall is perfectly doable with the right anchors and careful preparation.
With alligator anchors and accurate markings, your shelves will be straight, sturdy, and ready to showcase your favorite décor.

Matériaux Pont Masson Blog

Practical Guide: Low-Expansion Foam

Low-expansion foam is a valuable ally in construction, renovation, and insulation work. Easy to use and extremely effective when properly applied, it improves thermal and sound insulation, fills narrow gaps, and seals openings without causing damage. But when exactly should you use it—and how can you ensure proper application? Here’s a practical guide.


What Is Low-Expansion Foam?

Unlike high-expansion foam, which can expand up to three times its initial volume, low-expansion foam remains more contained (typically 10–30% expansion). This makes it ideal for precision work or in areas where excessive expansion could warp materials or block mechanisms.


When to Use It

Here are some situations where low-expansion foam is particularly suitable:

  1. Around Doors and Windows
    It seals gaps between the frame and wall without exerting too much pressure, preventing warping that could hinder proper opening or closing.

  2. Filling Small Cavities
    In walls, floors, or ceilings—perfect for filling small holes without overflow or excessive swelling.

  3. For Precise Insulation Projects
    It’s great around electrical boxes, pipes, or wooden structures where uncontrolled expansion could crack or damage components.

  4. When Maximum Control Is Needed
    In finished areas (like painted walls or drywall), low-expansion foam minimizes potential damage.


How to Use It Properly

  1. Prepare the Surface
    Ensure the surface is clean, dry, and dust-free. A slight misting of water can help the foam cure faster.

  2. Shake the Can Thoroughly
    Shake the cartridge vigorously for about 30 seconds before use to mix the components properly.

  3. Apply with Precision
    Insert the nozzle into the gap and apply slowly from the back outward. Fill only 50–70% of the space—the foam will expand slightly.

  4. Let It Cure Completely
    Depending on the product, curing takes between 1 and 8 hours. Avoid touching it during this time.

  5. Trim the Excess and Finish
    Once cured, cut off any surplus with a knife and cover with plaster, paint, or another finish.


Additional Tips

  • Always wear gloves and safety goggles.

  • Keep foam cleaner handy for fresh spills.

  • Don’t shake the can while applying.

  • Store upright at room temperature to prevent clogging.


In Summary

Low-expansion foam is perfect for precise applications. When used correctly, it provides long-lasting, damage-free insulation. Whether you’re a weekend DIYer or a professional, knowing when and how to use it will help you achieve better results and avoid costly mistakes.

Matériaux Pont Masson Blog

How to Calculate the Number of Siding Packs Needed to Redo a House Exterior

Redoing your home’s exterior siding is a major project that enhances the appearance, protects the structure, and improves energy efficiency. To plan properly, you need to know how many packs of siding will be required. Here’s a clear guide to help you calculate it yourself.


1. Measure the Wall Surface Area

Start by measuring each wall of the house: the width and height, in feet (ft). Multiply these two values to get the wall area in square feet (sq. ft).

For example, a wall that’s 30 ft wide and 10 ft high gives you 300 sq. ft.

Do this calculation for each wall:

  • Front wall: 30 ft × 10 ft = 300 sq. ft

  • Back wall: 30 ft × 10 ft = 300 sq. ft

  • Left wall: 24 ft × 10 ft = 240 sq. ft

  • Right wall: 24 ft × 10 ft = 240 sq. ft
    Total gross area: 1,080 sq. ft


2. Subtract Openings

Next, calculate the surface area of windows and doors to subtract from the total area.

For example:

  • 1 door, 3 ft × 7 ft = 21 sq. ft

  • 5 windows, 3 ft × 4 ft = 12 sq. ft each → 60 sq. ft total
    Total openings: 81 sq. ft
    Net surface area to cover: 1,080 sq. ft – 81 sq. ft = 999 sq. ft


3. Add a Waste Margin

Add about 10% to 15% to compensate for cuts and fitting adjustments.

If you apply a 10% margin:
999 sq. ft × 1.10 = 1,098.9 sq. ft, which you can round up to 1,100 sq. ft


4. Calculate the Number of Packs Needed

Check how many square feet are covered by one pack of your chosen siding.
For example, one pack of CanExel Ridgewood D5 covers 44 sq. ft.
Divide the total surface area by the coverage per pack:

1,100 sq. ft ÷ 44 sq. ft = 25 packs

Always round up to the next whole number.
You’ll therefore need 25 packs.


Summary

Step Result
Wall area 1,080 sq. ft
Minus openings 81 sq. ft
Net surface area 999 sq. ft
+10% waste margin ≈ 1,100 sq. ft
Coverage per pack 44 sq. ft
Required packs 25 packs

Conclusion

By taking the time to measure accurately and account for waste, you can avoid surprises and ensure a well-planned siding project. It’s also wise to buy one or two extra packs to cover potential repairs or installation errors.

Matériaux Pont Masson Blog

Build a Structure for a Rectangular Shade Sail

ow to Build a Structure for a Rectangular Shade Sail in Your Yard

Want to enjoy your yard without getting scorched by the sun? A rectangular shade sail is a simple, stylish, and effective way to create a cool and comfortable space. But to keep it secure and long-lasting, you’ll need a solid structure. Here’s a practical step-by-step guide to build your own.


Materials Needed

Materials:

  • 4 treated wood posts (4"x4") or metal (galvanized steel or aluminum)
  • Quick-set concrete (to anchor the posts)
  • Galvanized screws or bolts
  • Stainless steel cables or turnbuckles
  • Carabiners and mounting rings
  • Rectangular shade sail (e.g., 3x4 m or 4x5 m depending on your space)

Tools:

  • Shovel or auger
  • Drill/driver
  • Level
  • Socket wrenches
  • Measuring tape
  • Step ladder

Step 1: Choose the Right Location
Before you start, observe your yard:

  • Position the sail to maximize shade during peak sun hours
  • Choose a clear area without branches or obstacles
  • Ensure the ground is stable for post installation
    Tip: Plan for a slope of about 20% on one side of the sail to allow rainwater to drain.

Step 2: Mark and Dig Post Holes
Mark the four corners where the posts will go, accounting for the sail’s dimensions plus a few extra centimeters for tension.

  • Dig holes about 90 cm deep (or more depending on soil).
  • Insert the posts and align them using a level.
  • Pour concrete around each post and let it cure for 24–48 hours.
    Variation: You can attach two corners of the sail to solid walls and use only two posts for the other corners.

Step 3: Install the Mounts
Once the posts are secure:

  • Drill and install eye hooks or mounting rings at the top of each post.
  • Place them at slightly different heights to create the sail’s slope.
  • Attach cables or turnbuckles to the sail and connect them to the posts using carabiners.
  • Tensioning: Adjust the turnbuckles until the sail is taut, with no sagging or wrinkles.

Step 4: Customize and Maintain

  • Paint or stain the posts to protect them from weather and match your outdoor decor.
  • Clean the sail occasionally with mild soapy water.
  • Check the mounts after strong winds or storms.

In Summary
Installing a rectangular shade sail in your yard is a beginner-friendly project. With a bit of planning and quality materials, you’ll enjoy a stylish and durable shaded area all summer long—and beyond!

Matériaux Pont Masson Blog

How to Properly Maintain Your Cast Iron Skillet

How to Properly Maintain Your Cast Iron Skillet

The cast iron skillet is a must-have for cooking enthusiasts: sturdy, durable, and capable of delivering even heat—it can last a lifetime if properly cared for. Whether you’ve just bought one or want to revive an old model, here’s everything you need to know to maintain it correctly.


1. Seasoning: The Key to Longevity
Seasoning creates a natural non-stick surface and protects the iron from rust.
How to do it:

  • Clean your skillet (see below).
  • Warm it slightly to dry thoroughly.
  • Apply a thin layer of vegetable oil (canola, flaxseed, or sunflower).
  • Wipe off excess with a paper towel.
  • Place it upside down in a preheated oven at 200°C (400°F) for 1 hour (use foil underneath to catch drips).
  • Let it cool in the oven.
    Tip: Repeat 2–3 times if your skillet is new or rusty.

2. Gentle Cleaning
Forget the dishwasher and harsh detergents! Cast iron should be hand-washed right after use.
Simple method:

  • Rinse with hot water while still warm.
  • Use a non-abrasive brush or sponge.
  • For stuck-on food, add salt or gently scrape with a wooden spatula.
  • Dry immediately with a clean towel.
  • Apply a very thin layer of oil before storing.
    Avoid: soaking, repeated soap use, or storing while damp.

3. Storage: Dry and Lightly Oiled
Cast iron hates moisture.
Tips:

  • Store in a dry place.
  • If stacking, place a paper towel between skillets.
  • Lightly oil the interior after each use or cleaning.

4. What If It Rusts?
Don’t worry! Rust doesn’t mean your skillet is ruined.
Steps to restore:

  • Scrub rust with steel wool or a wire brush.
  • Clean and rinse thoroughly.
  • Repeat the seasoning process.

In Summary
Maintaining a cast iron skillet takes a bit of care, but it’s simple. Once properly seasoned and gently cleaned, it becomes your go-to tool for perfect searing and comforting slow-cooked meals.

Got an old skillet from grandma or a specific issue? Share your experience in the comments!

Matériaux Pont Masson Blog

8 Common Painting Mistakes to Avoid When Decorating a Room

When painting a room, certain mistakes can compromise the final look and durability of the job. Here are the main errors to avoid and how to fix them:

  1. Not properly preparing the walls
    ❌ Mistake: Painting over dirty, damp, or uneven surfaces.
    ✅ Solution: Clean the walls (dust, grease), fill holes and cracks with filler, then sand for a smooth surface.

  2. Skipping the primer
    ❌ Mistake: Applying paint directly on raw walls or over dark colors.
    ✅ Solution: Use a suitable primer (plaster, wood, metal...) to improve adhesion and reduce the number of coats needed.

  3. Choosing low-quality paint
    ❌ Mistake: Using cheap paint that doesn’t cover well and deteriorates quickly.
    ✅ Solution: Invest in high-quality paint with good coverage and durability (especially for kitchens, bathrooms, washable surfaces...).

  4. Painting without protecting the room
    ❌ Mistake: Not covering floors, furniture, and baseboards, leading to hard-to-remove stains.
    ✅ Solution: Lay down a tarp, use masking tape for edges, and cover furniture with plastic sheeting.

  5. Applying too much paint at once
    ❌ Mistake: Overloading the roller or brush, causing drips and visible streaks.
    ✅ Solution: Apply several thin coats, cross strokes (horizontal then vertical), and let each layer dry properly.

  6. Painting in poor conditions
    ❌ Mistake: Painting in a room that’s too humid or too hot.
    ✅ Solution: Work in a well-ventilated room at a temperature between 15–25°C, and avoid days with high humidity.

  7. Ignoring drying times
    ❌ Mistake: Moving furniture back too soon or applying another coat before the previous one is dry.
    ✅ Solution: Follow the drying time indicated on the paint can (usually 6 to 24 hours between coats) to avoid marks and imperfections.

  8. Neglecting the finishing touches
    ❌ Mistake: Leaving visible lines or removing masking tape too late.
    ✅ Solution: Smooth edges with a light roller pass and remove masking tape before the paint fully dries to prevent peeling.

By avoiding these mistakes, you'll achieve a clean, even, and long-lasting result for your interior painting!

Matériaux Pont Masson Blog

How to Install a Baseboard Heater for Efficient Heating

Installing a baseboard heater is an effective way to heat your home, especially in regions with harsh winters like Québec. These units provide even heat and are relatively easy to install. Here’s a step-by-step guide to help you install a baseboard heater in your home.


Why Choose a Baseboard Heater?

Baseboard heaters offer several advantages:

  • Energy Efficiency: They convert nearly all consumed energy into heat.
  • Simple Installation: With basic tools, you can install them yourself.
  • Even Heating: They distribute heat evenly throughout the room.

Steps to Install a Baseboard Heater

1. Choose the Location

Install the heater along an exterior wall—often called a “cold wall”—to counter heat loss. Make sure to leave at least 6 inches of space above the unit for proper air circulation.

2. Turn Off the Power

Before starting, turn off the power at the main panel to avoid any risk of electric shock.

3. Mount the Heater to the Wall

Use the pre-drilled holes on the unit to securely attach it to the wall. Ensure the heater is level for optimal performance.

4. Connect the Electrical Wires

Connect the heater wires to the power supply wires, following local electrical codes. If you’re not comfortable with electrical work, it’s best to hire a professional.

5. Install the Thermostat

Some heaters come with a built-in thermostat, while others require a separate installation. Follow the manufacturer’s instructions for proper setup.

6. Restore Power and Test the Unit

Once installation is complete, turn the power back on and test the heater to ensure it’s working properly.


How to Determine the Right Power Rating for Your Heater

Use the following formula to calculate the required wattage:

Power (W) = Room Area (m²) × Heating Requirement (W/m²)

Heating Requirement varies based on insulation:

  • Well-insulated home: 80–100 W/m²
  • Average insulation: 100–120 W/m²
  • Poor insulation: 120–150 W/m²

Example:
For a 15 m² room with average insulation:
15 m² × 100 W/m² = 1500 W

You would need a baseboard heater of approximately 1500 W to heat this room efficiently.


Additional Tips

  • Install on an Exterior Wall: Placing the heater under a window helps counter cold drafts.
  • Regular Maintenance: Clean the heater to prevent dust buildup and maintain performance.

By following these steps and using the right formula to determine the required power, you’ll enjoy efficient and comfortable heating all winter long.

Matériaux Pont Masson Blog

How to Identify the Different Grades of Eastern White Pine Boards

Eastern White Pine is valued for its strength, fine texture, and versatility. Widely used in construction, cabinetry, and interior finishing, understanding the different grades available helps you choose the right boards for your project. Here’s a practical guide to help you identify these grades:


1. Select Grade

The Select grade is the highest category for Eastern White Pine. It’s ideal for premium projects where aesthetics are a priority.

  • Appearance: High-quality boards with a defect-free face, though the back may show more variation.
  • Uses: Fine woodworking, moldings, high-end furniture.
  • Advantages: Smooth finish requiring minimal prep before painting or staining.

2. Grades #1 & #2 (Sound Knots)

These grades feature visible but solid knots, offering a balance between appearance and functionality.

  • Appearance: Knotty wood with a pleasing look, suitable for visible applications.
  • Uses: Flooring, interior paneling, furniture, siding, cornices, trim, roof edges, and other exterior uses.
  • Advantages: Good durability with a natural, warm appearance.

3. Appearance Grade

This grade offers a rustic look with more character—perfect for projects where visual charm outweighs perfection.

  • Appearance: Rustic wood with character, ideal for projects that embrace these qualities.
  • Uses: Paneling, siding, rustic furniture, outdoor projects like fences, garden furniture, crates, cladding, and various industrial applications.
  • Advantages: Rustic aesthetic, affordable price, ideal for a natural style.

Finishing and Post-Purchase Treatment

Regardless of the grade chosen, final treatment (sanding, staining, sealing) can greatly enhance the appearance and durability of the boards.

  • For a modern look: Choose Select grade with light stain or white paint.
  • For a rustic style: Opt for Appearance grade with a dark stain.

Conclusion: Choosing the Right Grade for Your Project

The choice of Eastern White Pine grade depends mainly on your budget, intended use, and aesthetic preferences. For refined projects, go with Select. For rustic or functional styles, Grades #1 & #2 or Appearance grade are perfectly suited.

Do you have a project in mind and need help choosing the right grade? Feel free to share your ideas in the comments!

Matériaux Pont Masson Blog

5 Tips to Get Your Backyard Ready for Spring

With spring’s arrival, it’s time to breathe new life into your backyard and prepare it to enjoy the sunny days ahead. Here are 5 essential tips to refresh your outdoor space and make it welcoming for the season.


1. Clean and Repair Outdoor Surfaces

Winter often leaves behind debris, stains, and damage on outdoor surfaces. Start by:

  • Picking up dead leaves and fallen branches
  • Cleaning your deck and walkways with a hose or pressure washer
  • Inspecting wood and stone structures to repair cracks or replace damaged boards

2. Prepare the Lawn

A well-maintained lawn is the foundation of a pleasant backyard. To achieve this:

  • Rake the lawn to remove thatch and encourage new growth
  • Add a bit of natural fertilizer to revitalize the grass
  • Reseed sparse areas to create a lush, green lawn

3. Refresh Flower Beds and Garden Areas

Your flower beds and green spaces need a spring makeover:

  • Weed the garden beds to prevent unwanted growth
  • Add mulch to retain soil moisture and enhance landscaping
  • Prune shrubs and perennials to stimulate healthy growth

4. Check and Maintain Outdoor Furniture

Outdoor furniture may have suffered from winter weather. Take time to:

  • Clean chairs and tables with soapy water
  • Apply protective coatings to wood or metal furniture
  • Replace damaged cushions and add new accessories for a fresh look

5. Create a Cozy Atmosphere

Once your yard is clean and organized, add decorative elements to make it more inviting:

  • Install outdoor lighting to extend your evenings
  • Add potted plants or colorful flowers for a fresh touch
  • Set up a relaxation corner with comfy chairs or a hammock

With these 5 simple tips, your backyard will be ready to welcome spring and become the perfect space to relax and entertain family and friends.

Matériaux Pont Masson Blog

5 Reasons to Choose Vinyl Siding for Your Home

When it comes to choosing siding for your home’s exterior, vinyl stands out as a popular and practical solution. Durable, attractive, and affordable, it offers many advantages that appeal to homeowners. Here are five compelling reasons to choose vinyl siding for your home:


1. Excellent Value for Money

Vinyl siding is notably more affordable than other materials like wood or brick. Not only is the initial purchase cost lower, but installation expenses are also reduced thanks to its lightweight nature and ease of installation. It’s an ideal option for homeowners looking to renovate without breaking the bank.


2. Impressive Durability

Designed to withstand the elements, vinyl doesn’t warp due to climate changes. It resists moisture, won’t rot, and doesn’t crack—even after years of exposure to sun, rain, or snow. Some manufacturers even offer warranties of 20 to 40 years, a testament to the material’s longevity.


3. Minimal Maintenance

Unlike wood, which requires regular sanding and painting, vinyl siding only needs a simple wash with soapy water to maintain its shine. There’s no need to repaint, saving you time and money in the long run.


4. Variety of Styles and Colors

Vinyl siding comes in a wide range of colors, textures, and styles. Whether you prefer a traditional or contemporary look, you’ll easily find a model that complements your home’s aesthetic. Some types of vinyl even mimic the appearance of wood—without the drawbacks.


5. Easy Installation

Vinyl siding is designed for quick and easy installation. Thanks to its interlocking system, it can be installed by professionals or experienced DIYers. Its lightweight panels are easy to handle, reducing labor time and cost.


Conclusion

Choosing vinyl siding means opting for an economical, durable, and stylish solution with minimal upkeep. Whether you’re renovating or building a new home, vinyl is a smart choice that combines performance and visual appeal. Don’t hesitate to consult a professional to explore available options and find the perfect siding for your home.

Matériaux Pont Masson Blog

Polyglass Products Now Available at Our Mirabel Branch!

Good news!
We’re excited to announce that Polyglass products are now available at our Mirabel branch.

Known for its innovative waterproofing solutions, Polyglass offers a complete range of high-performance roofing and waterproofing membranes. Whether you're a contractor, roofer, or homeowner, choosing the right products is essential to ensure the durability and performance of your roof.


Why Is It Crucial to Choose Quality Waterproofing Products?

Waterproofing is one of the most critical elements in roof installation and maintenance. A poor choice or careless installation can lead to water infiltration, structural damage, and high repair costs. Here’s why it’s essential to opt for high-performance waterproofing products:

Protection Against Water Infiltration
A poorly protected roof can allow water to seep in, causing mold, rot, and premature deterioration of materials.

Prevention of Structural Damage
Excess moisture can weaken the building’s structure and reduce the strength of the foundation, leading to costly repairs.

Improved Energy Efficiency
A well-sealed roof helps maintain a stable indoor temperature, reducing heat loss in winter and cool air loss in summer.

Extended Roof Lifespan
With quality waterproofing products like those from Polyglass, your roof will benefit from enhanced protection against weather and wear, extending its lifespan.


Why Choose Polyglass Products?

✔️ Advanced Technology: Self-adhesive and SBS-modified membranes for increased resistance
✔️ Superior Durability: Designed to withstand the harshest weather conditions
✔️ Easy Installation: Practical solutions that save time on your job sites


Visit Us at Our Mirabel Branch
Address: 9070, route Sir-Wilfrid-Laurier, Mirabel (Saint-Canut), J7N 0T2
Contact Us: 450-438-8898

Don’t miss this new arrival—make sure you have the best materials for your projects!