Facebook Pixel

Tagged with 'Maintenance'

Matériaux Pont Masson Blog

Spring Maintenance: 10 Simple Checks to Do Around Your Home

As the snow melts and warmer temperatures return, early spring is the perfect time to walk around your property and check how your home held up over the winter. Harsh weather, snow accumulation and freeze–thaw cycles can leave behind minor damage that is easy to fix if caught early.

The good news is that many of these tasks are simple and can be done by homeowners themselves with just a few basic tools.

Here are a few quick checks you can do at the start of spring.


1. Clean the gutters

Gutters often collect leaves, small branches and debris during the winter. When they are clogged, rainwater may overflow and accumulate near the house.

What you can do:

  • remove debris by hand or with a gutter scoop

  • rinse the gutters with a garden hose

  • make sure downspouts direct water away from the foundation

This simple task helps prevent several moisture-related problems.


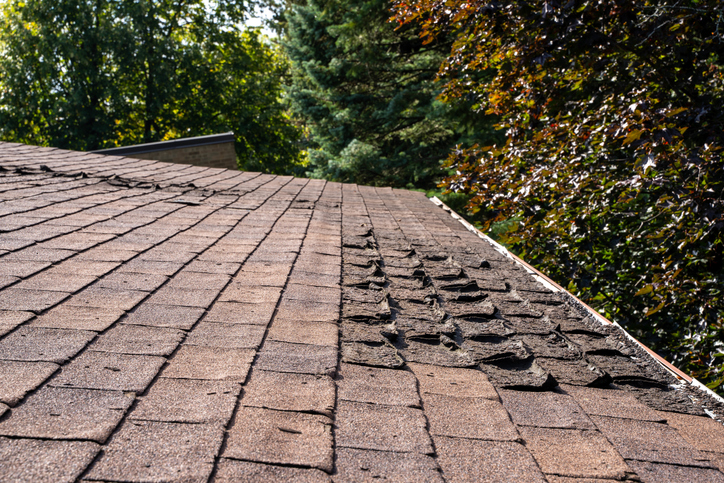
2. Check the roof from the ground

You do not need to climb onto the roof to do a first inspection. A quick look from the ground can often reveal early signs of damage.

Look for:

  • missing or lifted shingles

  • pieces of shingles on the ground

  • uneven areas on the roof surface

If you notice anything unusual, it may be worth scheduling a more detailed inspection.


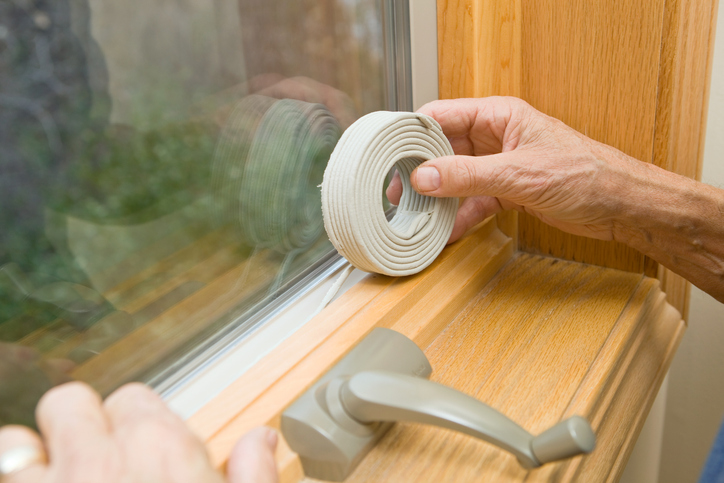
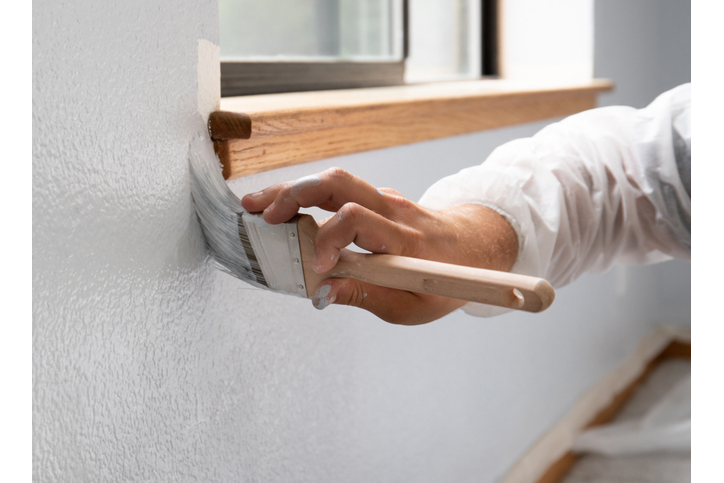
3. Inspect window and door caulking

The seals around windows and doors can crack over time due to temperature changes.

Take a quick look to see if the caulking is:

  • cracked

  • peeling

  • missing in some areas

Replacing it is a quick job that improves sealing and helps reduce energy loss.


4. Look at the foundation

Freeze–thaw cycles can sometimes cause small cracks in foundations.

Walk around your home and check for:

  • visible cracks

  • signs of moisture

  • water pooling near the foundation

If the ground around the house is very flat, adding soil to create a slight slope can help move water away from the foundation.


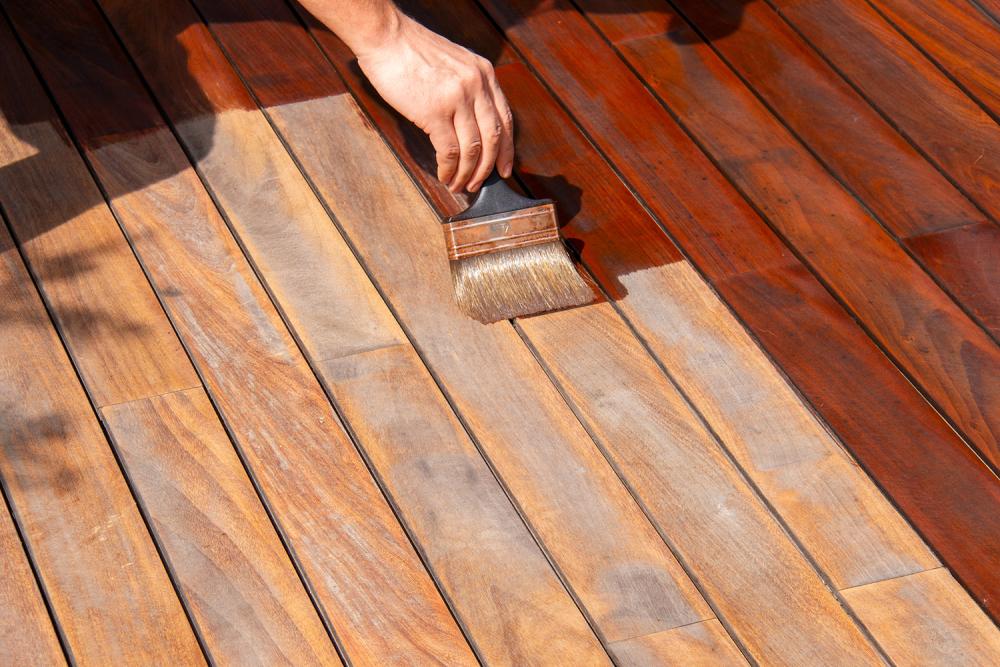
5. Inspect the deck or patio

Decks are exposed to the elements all winter long.

Take a few minutes to check:

  • cracked or damaged boards

  • loose screws or fasteners

  • the stability of railings

Often, tightening screws or replacing a board is enough to fix the issue.


6. Check the driveway and concrete surfaces

Freeze–thaw cycles can cause small cracks in asphalt or concrete.

Look for:

  • cracks in the driveway

  • chipped steps

  • open joints in pavers

Small cracks can often be repaired easily with patching products.


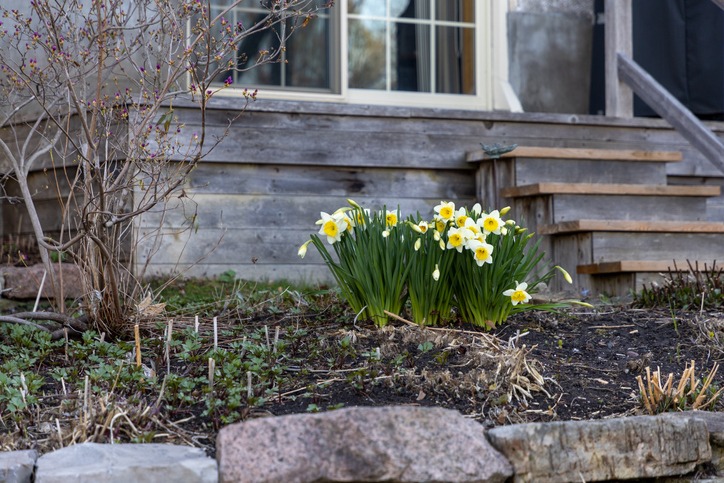
7. Clean up debris in the yard

Winter often leaves behind branches and debris around the property.

A quick cleanup helps:

  • clear the lawn

  • prepare the yard for spring

  • prevent damage to lawn equipment later in the season

A rake, a wheelbarrow and a few yard bags are usually all you need.


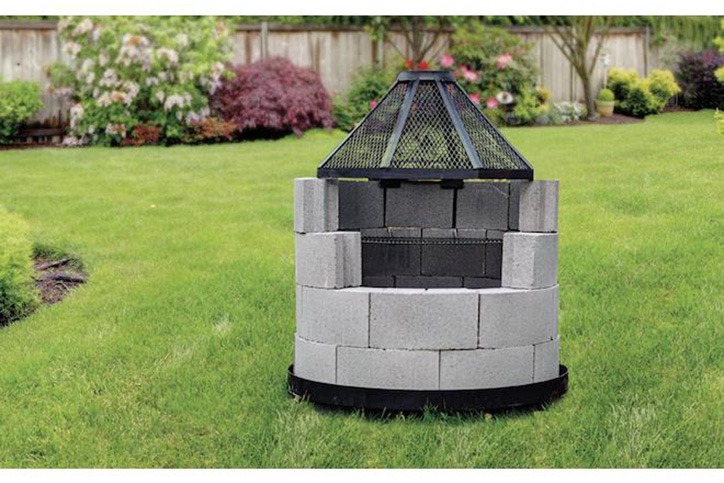
8. Check fences and outdoor structures

Snow and strong winds can sometimes weaken sections of fencing.

Walk around and check if:

  • posts are loose

  • boards are broken

  • a section of the fence is leaning

In many cases, tightening screws or replacing a board is enough.


9. Test the outdoor faucet

Before starting outdoor work, it is useful to check your outdoor faucet.

Turn the water on and make sure:

  • there are no leaks

  • water flows normally

  • the hose connection is in good condition

This quick check helps avoid surprises when you start using it.


10. Clean outdoor surfaces

Spring is also a good time to freshen up outdoor surfaces.

A simple cleaning can improve the appearance of:

  • the deck

  • the driveway

  • outdoor steps

  • exterior siding

A garden hose or pressure washer is often enough to remove dirt accumulated over the winter.


A good way to start the season

Taking a little time in early spring to complete these checks can help prevent larger repairs later in the season.

By tackling these simple tasks, you prepare your home and yard for the warmer months ahead while keeping your property in good condition.

Matériaux Pont Masson Blog

Sones and CFM: How to Choose the Right Kitchen Range Hood or Bathroom Fan

When shopping for a kitchen range hood or a bathroom exhaust fan, two technical terms often come up: sones and CFM. While they may sound complex at first, these numbers are essential to choosing an appliance that is efficient, quiet, and well-suited to your space.

At Pont-Masson, we believe that making the right choice starts with understanding the basics. Here’s a simple guide to help you shop with confidence.


What Does CFM Mean?

CFM (Cubic Feet per Minute) measures the amount of air an appliance can move in one minute. The higher the number, the more powerful the unit.

Why CFM Matters

  • It determines how effectively air is exhausted

  • It affects the removal of:

    • moisture

    • odors

    • smoke

    • grease

Recommended CFM by Application

For a Kitchen Range Hood

  • 300 to 400 CFM: light cooking (electric cooktop, occasional use)

  • 450 to 600 CFM: regular cooking, gas cooktops

  • 600 CFM and up: heavy cooking, large kitchens, or island installations

Tip: The more powerful your cooktop, the higher the CFM your range hood should have.

For a Bathroom Fan

  • 50 to 80 CFM: small bathroom or powder room

  • 80 to 110 CFM: standard-sized bathroom

  • 110 CFM and up: large bathrooms or rooms with glass showers or high ceilings

Simple rule: plan for about 1 CFM per square foot of bathroom space.


What Are Sones?

Sones measure the noise level of a fan or hood. The lower the sone rating, the quieter the appliance.

Understanding Sone Levels

  • 0.5 to 1 sone: very quiet (barely noticeable)

  • 1 to 2 sones: quiet and comfortable

  • 3 sones and above: clearly audible


Finding the Right Balance Between Power and Noise

A powerful appliance that is too loud often ends up being underused. The goal is to find the right balance between CFM and sones.

General Recommendations

Kitchen Range Hoods

  • Aim for under 3 sones at normal operating speed

  • Multi-speed models offer greater flexibility

  • A hood that is wider than the cooktop captures smoke more efficiently, reducing the need for excessive power

Bathroom Fans

  • 1.5 sones or less for optimal comfort

  • Ideal for daily or nighttime use

  • Quieter fans are more likely to be left running long enough to properly remove moisture


Other Factors to Consider

  • Proper ducting: poor duct installation reduces performance and increases noise

  • Installation type: wall-mounted, under-cabinet, ceiling-mounted, or island

  • Additional features:

    • timer

    • humidity sensor

    • LED lighting

    • washable filters


In Summary

Feature What to Remember
CFM Measures airflow power
Sones Measures noise level
Kitchen Focus on power with controlled noise
Bathroom Focus on quiet operation with adequate airflow

Need Help Choosing?

The Pont-Masson team is here to help you select the right product based on:

  • room size

  • usage habits

  • budget

  • comfort preferences

Visit us in store or browse www.pontmasson.com to discover a wide selection of kitchen range hoods and bathroom fans for every project.

Make the right choice today for cleaner, healthier air tomorrow.

Matériaux Pont Masson Blog

How to Know When It’s Time to Replace Your Windows

Windows play a key role in your home’s comfort, energy efficiency, and overall appearance. Over time, they wear out and become less effective, which can lead to heat loss, drafts, and higher energy bills. So how can you tell when it’s time to replace your windows? Here are the main signs to watch for.


1. Drafts Around the Windows

If you feel cold air in winter or warm air in summer near your windows—even when they are fully closed—it often indicates:

  • poor sealing;

  • worn weatherstripping;

  • aging or outdated installation.

Drafts reduce comfort and increase heating and cooling costs.


2. Condensation Between the Panes

Fog or condensation between the glass panes of double- or triple-pane windows is a clear sign that the seal has failed. When this happens, the insulating gas escapes, significantly reducing the window’s thermal performance.

Once the seal is broken, the window usually cannot be effectively repaired and should be replaced.


3. Windows That Are Hard to Open or Close

Over time, window frames can warp due to moisture, temperature changes, or general wear. If your windows:

  • stick or jam;

  • scrape when opening or closing;

  • no longer close properly;

this can affect safety, insulation, and proper ventilation.


4. Rising Heating or Cooling Costs

Old or inefficient windows are often responsible for significant energy loss. If your energy bills are increasing without a clear explanation, your windows may be part of the problem.

Replacing outdated windows with energy-efficient models can lower energy consumption and improve year-round comfort.


5. Visible Signs of Deterioration

Regularly inspect your windows both inside and outside. Warning signs include:

  • rotting or cracked wood;

  • swollen or warped frames;

  • peeling paint;

  • water infiltration around the frame.

If left unaddressed, these issues can lead to more serious structural damage.


6. Increased Outside Noise

If street noise, traffic, or neighborhood sounds seem louder than before, your windows may no longer provide adequate sound insulation.

Modern windows offer improved acoustic insulation, which is especially beneficial in urban areas or near busy roads.


7. Windows Over 20 Years Old

Even if they still appear functional, windows that are 20 years old or more are generally far less efficient than today’s models.

New windows offer:

  • better energy efficiency;

  • increased comfort;

  • improved air and water tightness;

  • added value to your home.


Repair or Replace?

Minor repairs may be sufficient in some cases (weatherstripping, hardware replacement, adjustments). However, if problems are frequent or widespread, replacing your windows is often the most cost-effective solution in the long run.


Trust the Experts at Pont-Masson

At Pont-Masson, we understand that replacing windows is a major investment. Our experts can help you:

  • assess the condition of your existing windows;

  • choose models suited to your home and Canada's climate;

  • understand available energy-efficiency options.

Not sure about the condition of your windows?
A preventive evaluation can help you avoid unpleasant surprises.


Looking for Windows or Expert Advice?

Visit one of our stores or explore www.pontmasson.com to discover our selection of windows and get expert guidance for your renovation project.

Matériaux Pont Masson Blog

How to Know When to Replace Your Roof Shingles

Your roof is one of the most important components of your home. It protects you from harsh weather, cold, heat, and moisture. However, many homeowners wait too long before replacing their shingles, which can lead to costly damage. So, how do you know when it’s time to replace your roof shingles? Here are the key signs to watch for.


1. The Age of Your Shingles

Asphalt shingles typically last between 15 and 25 years, depending on their quality, installation, and weather conditions. In Québec and Ontario, harsh winters, freeze-thaw cycles, and strong winds can shorten their lifespan.

Good to know:
If your roof is approaching or has exceeded 15–20 years, even if it still looks fine, a professional inspection is strongly recommended.


2. Shingles That Are Curling, Cracked, or Lifting

One of the most obvious signs of an aging roof is shingles that are:

  • curling or buckling;

  • cracked;

  • lifting due to wind exposure.

These issues indicate that the shingles have lost their flexibility and sealing ability.


3. Granules in the Gutters or on the Ground

Asphalt shingles are coated with granules that protect them from UV rays and wear. Over time, these granules begin to loosen and fall off.

Warning sign:
If you notice a significant amount of granules in your gutters or around your home’s foundation, it’s a clear sign your shingles are deteriorating.


4. Water Leaks or Stains on Ceilings

Water infiltration should never be ignored. Even small brown stains on ceilings or walls can indicate:

  • damaged shingles;

  • worn underlayment;

  • ventilation or flashing issues.

The longer you wait, the more expensive repairs can become, as water can damage insulation, roof structure, and even cause mold.


5. Missing Shingles After a Storm

After strong winds or storms, it’s always a good idea to visually inspect your roof. Missing or displaced shingles expose your home directly to the elements.

A single missing shingle can sometimes be repaired, but if this happens repeatedly, a full roof replacement may be the best solution.


6. A Sagging Roof

A visibly sagging roof is a serious warning sign. It may indicate structural problems caused by:

  • prolonged water infiltration;

  • excess weight from snow or ice;

  • deterioration of the roof decking.

In this situation, it’s essential to consult a professional as soon as possible.


7. Rising Heating or Cooling Costs

An aging roof can lose its energy efficiency. If your home becomes harder to heat in winter or keep cool in summer, your roof could be part of the problem.

Replacing shingles and improving roof ventilation can increase comfort and reduce energy costs.


Repair or Replace?

A simple repair may be enough if:

  • the roof is relatively new;

  • the damage is localized;

  • the roof structure is in good condition.

However, if problems are frequent or widespread, replacing the shingles is often more cost-effective in the long run.


Trust the Experts at Pont-Masson

At Pont-Masson, we understand that your roof is a major investment. Our experts can help you:

  • assess the condition of your shingles;

  • choose the right materials for your home and Canada's climate;

  • determine the right time to replace your roof.

Not sure about your roof’s condition?
It’s always better to inspect it early before a small issue becomes a major repair.


Need Roofing Advice or Materials?

Visit us in-store or explore www.pontmasson.com to discover our selection of shingles, roofing accessories, and expert advice.

Matériaux Pont Masson Blog

How to Improve Air Quality in Your Home

When we think of air pollution, we often picture car exhaust and outdoor smog. But the air inside our homes can be just as polluted—sometimes even more—especially in well-insulated spaces where air tends to stagnate. Dust, allergens, mold, chemical products, and excess humidity all contribute to poor indoor air quality. Fortunately, there are many simple actions you can take to make your home healthier.

1. Ventilate regularly to refresh the air

Ventilation is one of the most effective ways to improve indoor air quality.

  • Open windows even for a few minutes each day, including in winter.

  • Use exhaust systems: kitchen range hood, bathroom fan, dryer vented outdoors.

  • When doing renovations or using strong products (paint, varnish, solvents), ventilate thoroughly to remove chemical vapors.

Proper airflow helps reduce humidity, odors and airborne pollutants.

2. Keep your home clean to reduce allergens

Regular cleaning helps eliminate dust, mites, spores and irritants.

  • Vacuum and dust frequently.

  • Limit clutter and materials that trap dust.

  • Choose cleaning products with fewer chemicals to avoid releasing volatile compounds.

A clean home greatly contributes to cleaner air.

3. Use proper filtration to capture particles

Filters play a major role in removing airborne contaminants.

  • Install good-quality filters in your heating or cooling system.

  • Whenever possible, choose HEPA filters, especially for allergy sufferers.

  • Clean or replace filters as recommended; dirty filters lose efficiency and may recirculate pollutants.

Good filtration significantly improves indoor air quality.

4. Control humidity to prevent mold

High humidity encourages mold growth, which can affect respiratory health.

  • Maintain humidity between 30% and 50%.

  • Use a dehumidifier in damp areas such as basements or bathrooms.

  • Repair leaks or water infiltration promptly.

Managing humidity helps prevent mold-related health risks.

5. Reduce sources of chemical pollutants

Many everyday activities release chemicals into the air.

  • Choose low-emission materials and paints during renovation projects.

  • Ventilate well when using adhesives, solvents, or strong cleaners.

  • Avoid synthetic air fresheners and aerosols that introduce unnecessary pollutants.

Fewer chemicals mean a healthier living environment.

Conclusion

Improving indoor air quality comes down to simple habits: proper ventilation, regular cleaning, effective filtration, humidity control and limiting chemical exposure. These manageable actions enhance both comfort and health for everyone in your home.

Matériaux Pont Masson Blog

How to Replace a Toilet: Step-by-Step Guide

Replacing a toilet is a simple home project that many homeowners can do themselves with the right tools and preparation. Whether you’re upgrading your bathroom or replacing an old model, here’s how to do it efficiently.

1. Gather your tools and materials

Before you begin, make sure you have:

  • A new toilet (tank and bowl)

  • A new wax or rubber seal

  • An adjustable wrench

  • A putty knife

  • A level

  • Gloves and rags

Pont Masson Tip: You’ll find all the tools and supplies you need in store, including experts to answer your questions!

2. Remove the old toilet

  1. Shut off the water supply and flush to empty the tank.

  2. Disconnect the water line.

  3. Unscrew the bolts at the base.

  4. Gently lift the toilet (two people makes it easier).

  5. Remove the old wax ring and clean the floor flange.

3. Install the new seal

Place the new wax or rubber seal on the flange, making sure it’s centered.

4. Position the new toilet

  • Align the holes with the bolts.

  • Press down firmly to seat the seal.

  • Tighten the bolts evenly (don’t overtighten).

  • Check that the toilet is level.

5. Reconnect the water and test

  • Reattach the water supply line.

  • Turn the water back on.

  • Let the tank fill and check for leaks.

6. Final touches

  • Trim any excess bolts.

  • Replace the bolt caps.

  • Seal around the base with silicone if desired.

Conclusion

Replacing a toilet yourself is an easy and affordable way to update your bathroom. Follow these simple steps for a clean, durable result — and visit Pont Masson for all your plumbing essentials.

Matériaux Pont Masson Blog

Get Your Home Winter-Ready: 7 Simple Ways to Save Energy and Money

As the cold weather sets in, our homes become cozy refuges — but winter in Québec can also mean high heating bills!
The good news? You can make your home more energy-efficient without major renovations or big expenses.
Here are 7 easy tips to stay warm this winter while saving energy (and money).


Seal Air Leaks

Small air leaks around doors and windows can account for up to 25% of heat loss.
Use caulking or weatherstripping to block drafts.
Pont Masson offers a variety of easy-to-install products to help you get started.


Switch to LED Lighting

LED bulbs use up to 80% less energy and last much longer than traditional ones.
A small change with a big impact throughout your home.


Insulate Your Attic and Basement

Heat rises — and often escapes through the roof.
Check the insulation in your attic and basement floor.
Adding insulation can quickly improve comfort and efficiency.


Maintain Your Heating System

Clean or replace filters and make sure vents aren’t blocked.
A well-maintained heating system uses less energy and keeps your home evenly warm.


Install Programmable Thermostats

Smart thermostats adjust the temperature automatically based on your schedule.
Lower the heat at night or when you’re away — and save up to 10% annually on energy bills.


Dress Your Windows

Heavy curtains or insulating window film can reduce heat loss by up to 15%.
Close them at night to keep the warmth in and open them during the day to let in sunlight.


Do a Quick Outdoor Check-Up

Before freezing temperatures arrive, inspect window seals, clean gutters, and protect outdoor faucets.
Small maintenance steps can prevent big problems later.


Conclusion

Winterizing your home doesn’t have to be complicated.
With a few smart upgrades and quality materials from Pont Masson, you can enjoy a warmer, greener, and more efficient home all season long.

Matériaux Pont Masson Blog

Small Renovations That Increase Your Home’s Value

Introduction

Thinking about selling your home or simply giving it a fresh new look?
Good news: you don’t need to take on a major renovation project to boost your property’s value.
With a few strategic updates, you can transform your space, modernize its appearance, and appeal to potential buyers.
Here are seven small renovations that make a big impact.


1. Refresh the Paint

Painting is one of the easiest, fastest, and most affordable ways to modernize a room.
Neutral and light shades like soft beige, pale gray, or off-white brighten up a space and make it feel larger.
Pont-Masson tip: explore our wide selection of high-quality paints and accessories for a flawless finish.


2. Update Hardware and Fixtures

Replacing cabinet handles, light switches, or door knobs instantly gives your home a more contemporary feel.
It’s a quick and low-cost upgrade that makes a noticeable difference.
At Pont-Masson, you’ll find a wide range of modern and durable designs.


3. Rethink the Lighting

Good lighting can completely redefine a room’s atmosphere.
Replace outdated fixtures with energy-efficient LED models, add recessed lighting, or hang pendant lights above the kitchen counter for a warm, stylish effect.


4. Refresh the Bathroom

You don’t have to tear everything out to give your bathroom a new look.
A modern faucet, a trendy mirror, and a fresh bead of silicone can make a world of difference.
Pont-Masson offers a variety of faucets, accessories, and durable materials to fit any budget.


5. Update the Kitchen

The kitchen is one of the most profitable rooms to renovate.
Repainting cabinets, changing handles, or installing a new backsplash can completely transform the space.
These small improvements significantly increase your home’s perceived value when it’s time to sell.


6. Improve Insulation and Windows

Investing in energy-efficient windows and good insulation is both eco-friendly and cost-effective.
You’ll reduce your energy bills while offering a major selling point to future buyers — an undeniable advantage in Canada's climate.


7. Enhance Curb Appeal

First impressions matter.
Clean the exterior siding, repaint the front door, and add plants, ambient lighting, or decorative touches to create a welcoming, well-maintained look.


Conclusion

These small renovations are smart investments that improve both your comfort and your home’s resale value.
Visit Pont-Masson — our experts will help you choose the best materials and products for any project, big or small.

Matériaux Pont Masson Blog

The 10 Most Common Interior Renovation Mistakes (and How to Avoid Them)

Introduction

Home renovations are exciting — until one small oversight or bad decision throws the whole project off track. Whether you’re a weekend DIYer or a seasoned handyman, certain mistakes come up again and again.

At Pont-Masson, we’ve helped thousands of homeowners turn their renovation ideas into success stories. Here are the 10 most common interior renovation mistakes — and how to avoid them so your next project goes smoothly, on time, and within budget.


Not Planning Enough

Before picking up your tools, take the time to define your needs, set your budget, and outline your priorities. Proper planning helps you stay organized and avoid costly surprises.

Pont-Masson Tip: Our in-store advisors can help you plan your renovation, choose the right materials, and calculate quantities so you start your project on solid ground.


Underestimating the Budget

Renovations almost always cost more than expected. From small adjustments to unforeseen issues, it’s smart to plan an extra 10–15% in your budget for contingencies.

Pont-Masson experts can help you make an accurate estimate based on your chosen materials, ensuring you know the real cost before starting.


Choosing the Wrong Materials

Each room has its own specific needs — humidity, temperature, traffic level, and exposure. Using the wrong type of wood, paint, or flooring can lead to premature wear or costly rework.

Pont-Masson offers a wide range of high-quality, durable materials adapted to every space. Our experts can guide you toward the best choices for each application.


Skipping Surface Preparation

A professional finish starts with proper prep work. Before painting, laying flooring, or installing wall coverings, make sure to clean, sand, and repair your surfaces.

At Pont-Masson, you’ll find all the tools and products you need for the perfect prep — sandpaper, primers, sealants, cleaners, and more.


Poor Measuring

“Measure twice, cut once.” This classic rule still applies. Even a small measurement error can waste time, money, and materials.

Pont-Masson carries precise measuring tools — tapes, lasers, and levels — and our staff can show you how to use them properly.


6️⃣ Ignoring the Work Sequence

Doing things out of order can lead to frustration and extra work. For example:

  • Installing flooring before painting,

  • Setting fixtures before tiling,

  • Or doing moldings before ceiling finishes.

If you’re unsure of the proper order, Pont-Masson experts can help you plan your renovation step by step.


Forgetting Ventilation

Poor ventilation in a bathroom or kitchen leads to condensation, mold, and odors. Installing the right exhaust fan or air exchanger is essential for a healthy home.

Pont-Masson offers a wide selection of fans, hoods, and ventilation systems that combine performance and energy efficiency.


Neglecting Safety

Never underestimate safety. Protective gear like gloves, goggles, and masks can prevent injuries and keep your project on track.

Pont-Masson provides a full range of safety equipment to help you work confidently and comfortably.


Using the Wrong Tools

Even the best intentions won’t make up for poor tools. The right equipment makes all the difference between frustration and satisfaction.

Pont-Masson carries professional-grade tools — drills, saws, pliers, compressors, and more — and our team will help you choose exactly what you need for your project.


Trying to Do Everything Yourself

Some jobs, like plumbing and electrical work, require professional expertise and certification. Knowing when to call in the pros is a sign of wisdom, not weakness.

Pont-Masson partners with trusted local contractors and can recommend qualified professionals for your specialized renovation needs.

Matériaux Pont Masson Blog

Prep and Stain Your Wooden Deck the Right Way

How to Properly Prepare and Stain Your Wooden Deck

With the return of warm weather, your wooden deck becomes a central spot for meals, relaxation, and outdoor living. To keep it welcoming and in good condition, regular maintenance is essential. It starts with proper preparation followed by the application of a suitable exterior stain.

In this article, you’ll discover the key steps to effectively maintain your deck, along with product suggestions available at PontMasson.


1. Inspect and Clean the Deck
Before starting, inspect the entire deck. Look for cracked boards, protruding nails, or signs of rot. Replace damaged parts and reinforce loose fasteners.

Cleaning is essential to remove dirt, mold, old stain residue, or pollution. Use a specialized wood cleaner like SICO’s deep-acting formula that won’t damage the wood.

Apply the product as directed, let it sit, then rinse thoroughly with a garden hose or low-pressure washer.

Suggested Product: Exterior Wood Cleaner


2. Let It Dry Completely
After cleaning, let the deck dry thoroughly. Recommended drying time is at least 48 hours. The wood should feel dry to the touch and be dry internally.

If you have one, a moisture meter can help confirm the moisture level is below 15%, ensuring proper stain absorption.


3. Sand the Surface if Needed
Sanding smooths the surface and opens the wood grain for better stain adhesion. It’s especially useful if the wood is rough or has remnants of old stain.

Use an orbital sander with 60–80 grit sandpaper. After sanding, carefully remove all dust.

Suggested Product: Orbital Sander


4. Choose the Right Stain
Your stain choice depends on your aesthetic preferences and desired protection level:

  • Semi-transparent: Preserves the natural look of the wood while protecting against UV and moisture.
  • Opaque: Offers full coverage and hides imperfections. Ideal for older or damaged decks.

At PontMasson, you’ll find trusted brands like Steina and SICO known for performance and durability.

Suggested Product: Steina Exterior Stain


5. Apply the Stain
Apply stain when the weather is stable, between 10°C and 25°C. Avoid applying in direct sunlight or just before rain.

Apply in the direction of the wood grain using a brush, roller, or stain applicator pad. Work in sections to avoid visible lines. Two thin coats are often better than one thick coat.

Follow the drying time between coats and check for a uniform finish.

Useful Accessories:

  • Stain Applicator
  • Stain Brush

6. Long-Term Maintenance
A well-maintained deck requires little effort each year, but regular care extends its life. Gently clean it in spring, check the finish, and touch up worn areas as needed.

Reapplication frequency depends on the stain type and climate, but every 2–3 years is generally recommended.


Conclusion
Preparing and staining your deck isn’t complicated if you follow the right steps. With professional-grade products and proper drying times, you’ll achieve a durable, attractive finish that stands up to the elements.

Visit PontMasson.com to explore our selection of stains, tools, and maintenance tips. Your deck will thank you!

Matériaux Pont Masson Blog

How to Properly Maintain Your Cast Iron Skillet

How to Properly Maintain Your Cast Iron Skillet

The cast iron skillet is a must-have for cooking enthusiasts: sturdy, durable, and capable of delivering even heat—it can last a lifetime if properly cared for. Whether you’ve just bought one or want to revive an old model, here’s everything you need to know to maintain it correctly.


1. Seasoning: The Key to Longevity
Seasoning creates a natural non-stick surface and protects the iron from rust.
How to do it:

  • Clean your skillet (see below).
  • Warm it slightly to dry thoroughly.
  • Apply a thin layer of vegetable oil (canola, flaxseed, or sunflower).
  • Wipe off excess with a paper towel.
  • Place it upside down in a preheated oven at 200°C (400°F) for 1 hour (use foil underneath to catch drips).
  • Let it cool in the oven.
    Tip: Repeat 2–3 times if your skillet is new or rusty.

2. Gentle Cleaning
Forget the dishwasher and harsh detergents! Cast iron should be hand-washed right after use.
Simple method:

  • Rinse with hot water while still warm.
  • Use a non-abrasive brush or sponge.
  • For stuck-on food, add salt or gently scrape with a wooden spatula.
  • Dry immediately with a clean towel.
  • Apply a very thin layer of oil before storing.
    Avoid: soaking, repeated soap use, or storing while damp.

3. Storage: Dry and Lightly Oiled
Cast iron hates moisture.
Tips:

  • Store in a dry place.
  • If stacking, place a paper towel between skillets.
  • Lightly oil the interior after each use or cleaning.

4. What If It Rusts?
Don’t worry! Rust doesn’t mean your skillet is ruined.
Steps to restore:

  • Scrub rust with steel wool or a wire brush.
  • Clean and rinse thoroughly.
  • Repeat the seasoning process.

In Summary
Maintaining a cast iron skillet takes a bit of care, but it’s simple. Once properly seasoned and gently cleaned, it becomes your go-to tool for perfect searing and comforting slow-cooked meals.

Got an old skillet from grandma or a specific issue? Share your experience in the comments!

Matériaux Pont Masson Blog

8 Common Painting Mistakes to Avoid When Decorating a Room

When painting a room, certain mistakes can compromise the final look and durability of the job. Here are the main errors to avoid and how to fix them:

  1. Not properly preparing the walls
    ❌ Mistake: Painting over dirty, damp, or uneven surfaces.
    ✅ Solution: Clean the walls (dust, grease), fill holes and cracks with filler, then sand for a smooth surface.

  2. Skipping the primer
    ❌ Mistake: Applying paint directly on raw walls or over dark colors.
    ✅ Solution: Use a suitable primer (plaster, wood, metal...) to improve adhesion and reduce the number of coats needed.

  3. Choosing low-quality paint
    ❌ Mistake: Using cheap paint that doesn’t cover well and deteriorates quickly.
    ✅ Solution: Invest in high-quality paint with good coverage and durability (especially for kitchens, bathrooms, washable surfaces...).

  4. Painting without protecting the room
    ❌ Mistake: Not covering floors, furniture, and baseboards, leading to hard-to-remove stains.
    ✅ Solution: Lay down a tarp, use masking tape for edges, and cover furniture with plastic sheeting.

  5. Applying too much paint at once
    ❌ Mistake: Overloading the roller or brush, causing drips and visible streaks.
    ✅ Solution: Apply several thin coats, cross strokes (horizontal then vertical), and let each layer dry properly.

  6. Painting in poor conditions
    ❌ Mistake: Painting in a room that’s too humid or too hot.
    ✅ Solution: Work in a well-ventilated room at a temperature between 15–25°C, and avoid days with high humidity.

  7. Ignoring drying times
    ❌ Mistake: Moving furniture back too soon or applying another coat before the previous one is dry.
    ✅ Solution: Follow the drying time indicated on the paint can (usually 6 to 24 hours between coats) to avoid marks and imperfections.

  8. Neglecting the finishing touches
    ❌ Mistake: Leaving visible lines or removing masking tape too late.
    ✅ Solution: Smooth edges with a light roller pass and remove masking tape before the paint fully dries to prevent peeling.

By avoiding these mistakes, you'll achieve a clean, even, and long-lasting result for your interior painting!